


AG5 - Overview
Models starting with AG5
Click on the best match to narrow your results.
- AG50-10 Bosch Angle Grinder (5" Angle Grinder)
- AG50-10 (3 601 G92 010) Bosch Angle Grinder (Angle Grinder)
- AG50-10TG Bosch Angle Grinder (5" Angle Grinder with Tuckpointing Guard)
- AG50-11VS Bosch Angle Grinder (5" Variable Speed Angle Grinder)
- AG50-11VS (3 601 G94 010) Bosch Angle Grinder (Angle Grinder)
- AG50-11VSPD (3601G94210) Bosch Angle Grinder (Angle Grinder)
- AG50-125PD (3 601 G95 210) Bosch Angle Grinder (Angle Grinder)
- AG50-125PD Bosch Angle Grinder (5" High-Performance Angle Grinder)
- AG5119 Speed Queen Dryer (Residential)
- AG5119 Whirlpool Dryer (Whirlpool Dryer Ag5119)
- AG5219 Speed Queen Dryer (Residential)
- AG5219 Whirlpool Dryer (Whirlpool Dryer Ag5219)
- AG540E Grill Master Grill (BBQ)
- AG540EB Grill Master Grill (BBQ)
- AG540EP Grill Master Grill (BBQ)
- AG540WB Grill Master Grill (BBQ)
- AG5419 Amana Dryer
- AG550EPB Grill Master Grill (BBQ)
- AG555CC Grill Master Grill (BBQ)
- AG560EP Grill Master Grill (BBQ)
- AG58A Magic Chef Refrigerator (Magic Chef Refrigerator Rb19ky-2a Ag58a)
- AG58B Magic Chef Refrigerator (Magic Chef Refrigerator Rb19ky-2a Ag58b)
- AG590CC Grill Master Grill (BBQ)
Keep searches simple, eg. "belt" or "pump".

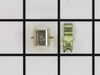
Dryer M-Series Coil Kit
PartSelect #: PS334310
Manufacturer #: 279834
When the igniter reaches a high enough temperature, these coils (Coil Valve, Dryer Gas Valve Coil Kit, Dryer Valve Coil Kit, Gas Valve Solenoid) work together to open the gas valve and allow the gas t...
$27.28
In Stock
 – Part Number: 8009")
Refrigerator Light Bulb (40w)
PartSelect #: PS884734
Manufacturer #: 8009
This an authentic OEM 40-Watt replacement light bulb, used in a number of household appliances. It is specially designed to withstand extreme temperatures, which is why these replacement bulbs are mos...
$17.80
In Stock

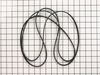
Multi Rib Belt
PartSelect #: PS11742271
Manufacturer #: WP40111201
This dryer drum drive belt attaches to the motor pully and works the drum as the motor rotates. The belt has a length of 93- 3/6 inches, and wraps all the way around the dryer drum, around a tension p...
$14.67
In Stock

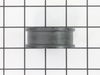
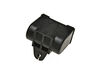
Idler Pulley Wheel w/ Bearing
PartSelect #: PS11757553
Manufacturer #: WPY54414
The idler pulley wheel helps the belt to rotate the drum in your dryer. If your dryer will not start, will not tumble, or is noisy during operation, the idler pulley wheel may need to be replaced. Thi...
$17.95
In Stock

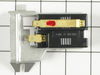
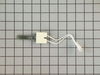
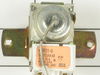
Dryer Radiant Flame Sensor
PartSelect #: PS11741429
Manufacturer #: WP338906
If your gas dryer is not heating up or igniting, then replacing the flame sensor, located in the burner assembly, could solve it. This part senses heat from the igniter to monitor if it is hot enough ...
$34.95
In Stock

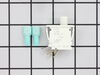
Refrigerator Door Switch
PartSelect #: PS12728638
Manufacturer #: W11384469
Door switch turns the light off when you close the door.
$29.37
In Stock

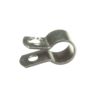
Dryer Door Catch Kit
PartSelect #: PS2162263
Manufacturer #: LA-1003
This door catch kit is designed for use in dryers. This is an authentic OEM replacement part. This catch assembly ensures the door of your appliance will close, and remain closed. It allows your appli...
$24.95
In Stock

Refrigerator Capacitor
PartSelect #: PS11757023
Manufacturer #: WPW10662129
This capacitor (Refrigerator and Freezer Compressor Run Capacitor, Run Capacitor) provides the voltage or energy current required to start the compressor and keep it running. It allows the compressor ...
$42.95
In Stock

Refrigerator Condenser Fan Motor Kit
PartSelect #: PS395284
Manufacturer #: 833697
This condenser fan motor kit is designed for use with refrigerators. This fan draws air through the condenser coils and over the compressor. It does this with the goal of cooling the warm refrigerant ...
$62.32
In Stock

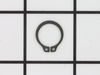
Retaining Ring
PartSelect #: PS11740487
Manufacturer #: WP23748
The metal retaining ring, which is under an inch long, holds the rear wheels on the axels of the dryer. The main reason why it would need to replaced is if the retaining ring has sprung out of place o...
$12.52
In Stock

Dryer Door Switch Kit
PartSelect #: PS1964648
Manufacturer #: W10169313
This part replaces two terminal switches in a dryer and prevents the dryer from running when the door is open. This includes two connectors. If your dryer will not shut off, start, or does not tumble,...
$21.95
In Stock

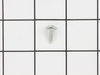
Refrigerator Screw
PartSelect #: PS12349731
Manufacturer #: W11233072
This is a multi-use and multi-appliance screw. It can be used on a microwave, refrigerator, range/oven, air conditioner, dehumidifier, washer, or dryer. The measurements of this screw are 8 x 1/2 inch...
$20.95
In Stock
Common Symptoms of models starting with AG5
[Viewing 25 of 25]Noisy
Fixed by
these parts
these parts
Show All
Light not working
Fixed by
these parts
these parts

Show All
Fridge too warm
Fixed by
these parts
these parts


Show All
Freezer section too warm
Fixed by
these parts
these parts
Show All
Door won’t close
Fixed by
these parts
these parts
Show All
Will Not Start
Fixed by
these parts
these parts
Show All
Fridge and Freezer are too warm
Fixed by
these parts
these parts
Show All
Not Heating
Fixed by
these parts
these parts

Show All
Drum Not Spinning
Fixed by
these parts
these parts
Show All
Leaking
Fixed by
these parts
these parts


Show All
Fridge runs too long
Fixed by
these parts
these parts
Show All
Clicking sound
Fixed by
these parts
these parts
Show All
Too warm
Fixed by
these parts
these parts
Show All
Won’t Start
Fixed by
these parts
these parts
Show All
Little to no heat when baking
Fixed by
these parts
these parts
Show All
Fridge too cold
Fixed by
these parts
these parts
Show All
Element will not heat
Fixed by
these parts
these parts
Show All
Door Sweating
Fixed by
these parts
these parts

Show All
Will not agitate
Fixed by
these parts
these parts
Show All
Too hot
Fixed by
these parts
these parts
Show All
Won’t start
Fixed by
these parts
these parts
Show All
Door latch failure
Fixed by
these parts
these parts

Show All
Freezer not defrosting
Fixed by
these parts
these parts
Show All
Door Pops Open
Fixed by
these parts
these parts
Show All
Burning smell
Fixed by
these parts
these parts
Show All
")


Keep searches simple. Use keywords, e.g. "leaking", "pump", "broken" or "fit".
Gas Dryer would not ignite
1. Removed lint screen and holder frame. Unplugged the electrical cord and closed the gas valve in the line before it goes into the dryer.
2. Removed two bolts at bottom front of machine and took off the bottom front panel.
3. Removed three bolts from black plastic exit vent and took it out to give more room to access everything ... Read more .
4. removed two wires and screws on the limit thermostat. Did the reverse to place the new one.
5. Removed wires (remembering placement), then holder screw. rotated the Gas Dryer Sensor counter clockwise to release the bottom tab so the sensor can be taken off the flame tube. Did the reverse to place the new one on.
6. Removed the one screw on the gas/flame tube that holds the bracket and igniter inside the flame tube. Removed the wires fro the igniter (remember placement) Slid the whole assembly toward the back of the machine to get the tube off the gas valve then rotated the whole assembly counter-clocwise to release the tab on the left side of the bracket. This was a little tight and had to work with it a bit to get the tab out and slide the whole piece out of the flame tube.
7. Once the tube and igniter were out i removed the scree that holds the igniter and replaced with the new one. Made sure no dust, etc. was in the piece.
8. Did the reverse to place the tube/igniter back into the flame tube.
9. Carefully and forcefully removed the wire connectors to the two coils. These were tough to get off. Removed the two screws that hold the bracket that holds the two coils in place. Slid the coils off the spindles remembering which one has the two wire connection and which one has the three wire connection and the way they went on. Replaced the old with the new. Placed the bracket onto the new coils and made sure the little bumps on the top are in the holes in the bracket. Tightened the screws to hold the coil bracket. Reattached the wire connectors to the coils making sure they go ALL the way back on.
10. Vaccumed everything I could to get lint, dust, etc. out.
11.Replaced the black vent plastic.
12 Made sure the exit vent on the back was not crimped or clogged. Checked the little flap door where the vent goes outside to make sure it opens and closes super easy to no air flow is restricted.
13. For testing I left the bottom panel open. Make sure you closed the door, reconnect the plug and turn the gas valve back on. Hit the go button on autodry or timed dry. The door must be closed to create the closed circulation of the system so the fan sucks the flame into the tube otherwise the flame will not fire deep into the tube and will set off one fo the overheat sensors. After hitting the go button your drum will start to rotate, then a few seconds later you'll hear a click and your igniter will start to burn bright orange. Another click and the gas should flow and ignite.
14. This shows that you've fixed the ignition problem. I just replaced everything I thought that could be wrong in stead of hunting and trial and error. All the parts were about $137 so I thought it was worth making sure.
15. IMPORTANT: If during your test the flame turns off after a little while then turns back on only to turn off again, don't panic. This happened to me as well. I found that you need to run the dryer with wet clothes in the dryer. The wetness in the clothes will keep the autodry sensor from shutting off the dryer since there will be moisture in the exhaust. If it's on timed dry the wet clothes will cool the exhaust air and keep the overheat sensors from turning the heat off. So no heating of dry clothes to get out wrinkles. Just dry the wet clothes. This is all I did and it's been working great so far. Good Luck!
Read less
Parts Used:


-
Michael from Kirkwood, MO
-
Difficulty Level:Easy
-
Total Repair Time:30 - 60 mins
-
Tools:Nutdriver, Pliers, Screw drivers
446 of 525 people
found this instruction helpful.
Was this instruction helpful to you?
Thank you for voting!
Dryer ran but would not heat
PartSelect showed seven different possibilities why the dryer wouldn't heat. I removed the two screws to remove the bottom panel and turned the dryer on and noticed that the heating element that ignites the gas was working fine. This meant that it was not getting gas so it could be the gas valve or one of the two gas valve coils which are
... Read more
located on top of the gas valve. I borrowed my neighbor"s ohm meter and touched the two probes on the coils terminals to check for continuity and found that one of the coils read zero. I then took both of the coils out by removing two screws and tested each coil again. One coil read 500-850 and the other read zero. This meant that it was no good so I called for the part and received it in three days. I reassembled the parts and turned the dryer on and it fired up after a few seconds. It works as good as new. The part plus shipping was less than $30. My repairman would have charged me $150-$200. While the dryer was apart I gave it a good cleaning with a vacuum and a toothbrush in delicate areas. I also removed and cleaned the lint trap housing by removing two nuts. I didn't know much about gas dryers, but thanks to PartSelect I easily fixed it myself.
Read less
Parts Used:
-
Gary from Haverhill, NH
-
Difficulty Level:Easy
-
Total Repair Time:30 - 60 mins
-
Tools:Nutdriver, Screw drivers, Socket set
411 of 470 people
found this instruction helpful.
Was this instruction helpful to you?
Thank you for voting!
My refrigerator stopped cooling and the freezer section stopped freezing
I knew the chances of all the freon leaking out was unlikely so I looked at the wiring to the compressor and there was a capacitor and a starter/overload so i figured I would start there. I went on line and found the parts at this site and they were less than the minimum service call charge for a service tech so I figured what the heck le
... Read more
t's give her a shot so I did give it a shot. I ordered the parts and they were there in less time than a service tech could come out and i installed the parts and guess what for 90.00 in parts and 15 minutes in time I repaired my refrigerator. Thanks guys, It took less time to order the parts than it did to make the repair so thanks, your website rocks and is very well designed so my hat is off to you guys!
Read less
Parts Used:
-
garth from forest lake, MN
-
Difficulty Level:Really Easy
-
Total Repair Time:15 - 30 mins
-
Tools:Nutdriver, Screw drivers
425 of 527 people
found this instruction helpful.
Was this instruction helpful to you?
Thank you for voting!