


91193508990 Kenmore Range - Overview
Sections of the 91193508990
[Viewing 6 of 6]
Keep searches simple, eg. "belt" or "pump".

Range Burner Bowl 8
PartSelect #: PS244399
Manufacturer #: WB31T10015
This part is located beneath the element and catches any spills.
$20.95
In Stock

Range Burner Bowl 6
PartSelect #: PS244398
Manufacturer #: WB31T10014
This burner bowl is also known as a burner drip bowl or burner drip pan, and is designed for use with your cooktop or range. It is black in color and is approximately 6 inches in diameter. It can be f...
$16.95
In Stock

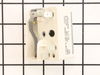
Range Burner Switch For 8 Inch Burner
PartSelect #: PS236750
Manufacturer #: WB24T10025
The 8-inch surface element switch is also known as an infinite heat switch, and is a part for your range. It controls the large surface element. It will turn the element on and off, and allow you to c...
$41.95
In Stock


Range Surface Element Control Switch 6 Inch 1560 W
PartSelect #: PS236754
Manufacturer #: WB24T10029
This switch controls the small burner on a range/stove top.
$47.95
In Stock


Range Door Gasket
PartSelect #: PS8753695
Manufacturer #: WB04T10086
The oven door gasket creates a seal between the oven door and the opening of the oven to prevent heat from escaping when the oven is closed.
$53.41
In Stock

RECEPTACLE PUSH-IN
PartSelect #: PS752188
Manufacturer #: WB08T10026
This part is the replacement light socket for your oven. The oven light socket provides power to the light, and at the same time holds the light bulb in place.
$15.95
In Stock

Screw
PartSelect #: PS271689
Manufacturer #: WH2X930
This screw is sold individually.
$13.95
In Stock

Range Light Cover
PartSelect #: PS247415
Manufacturer #: WB36X192
This light bulb lens covers the interior light bulb in an oven, range, or stove. No tools are necessary to replace this part. Simply slide off the wire bracket to remove the existing light bulb lens. ...
$21.95
In Stock

Front Drawer Support
PartSelect #: PS249583
Manufacturer #: WB48T10013
Introducing the GE Front Drawer Support, a highly important component for maintaining the range drawer's stability. The drawer support is meticulously designed to ensure your range's drawer remains fu...
$13.95
In Stock

Range Door Pad
PartSelect #: PS222173
Manufacturer #: WB01T10026
This is the door pad only. The trim is sold separately.
$13.95
In Stock
Manuals & Care Guides for 91193508990
Click to downloadQuestions And Answers for 91193508990
We're sorry, but our Q&A experts are temporarily unavailable.
Please check back later if you still haven't found the answer you need.
Common Symptoms of the 91193508990
[Viewing 6 of 6]Element will not heat
Fixed by
these parts
these parts


Show All
Little to no heat when baking
Fixed by
these parts
these parts


Show All
Oven not heating evenly
Fixed by
these parts
these parts

Show All
Oven is too hot
Fixed by
these parts
these parts
Show All
Will Not Start
Fixed by
these parts
these parts
Show All
Door won’t close
Fixed by
these parts
these parts


Show All


Keep searches simple. Use keywords, e.g. "leaking", "pump", "broken" or "fit".
The switches failed on both front burners.
Remove nobs from both switches.
Pull out the range (the hardest part).
REMOVE THE POWER PLUG FROM THE WALL
Remove 7 screws with nut driver and take off upper back panel.
Remove 2 phillips screws from front, they hold the switch brackets.
The new switches don't fit in the bracket so discard the bracket keeping the ... Read more screws.
Removing 1 wire at a time from the old switch transfer to the new noting the letter/number ie "H1 P1" combos they are all there just not in the same places on the new switch.
When wiring is complete, using the bracket ,screws from the front screw on the switches.
Replace the back panel with 7 screws.
In my case the old nobs did not fit the shafts of the new switches. I found some at the local hardware store. I bought 4 for $0.29 each! I expect to be replacing the other burner switches shortly.
Read less
Parts Used:
-
Marc from Columbia, NJ
-
Difficulty Level:Easy
-
Total Repair Time:15 - 30 mins
-
Tools:Nutdriver, Screw drivers
97 of 105 people
found this instruction helpful.
Was this instruction helpful to you?
Thank you for voting!
I needed new oven racks
My husband had turned the oven on to cook something and didn't know that I have a plastic tray in there. Well, needless to say I needed to get some new oven racks. I tried to get them through the manufacturer (GE). They were 68$ each. I thought that was a bit steep, so I looked online. I decided to order through PartsSelect. Well...they
... Read more
can 2 days later (the week before Christmas!!)and were a PERFECT fit.
Between the price, shipping speed and quality I will
definitely buy from again and recommend this site to everyone I know!!!!
Oh yeah, I work for Sears too. we have access to all sorts of parts....this site is the BEST for prices and delivery speed!!!!
Between the price, shipping speed and quality I will
definitely buy from again and recommend this site to everyone I know!!!!
Oh yeah, I work for Sears too. we have access to all sorts of parts....this site is the BEST for prices and delivery speed!!!!
Read less
Parts Used:
-
jamie from MORRISVILLE, PA
-
Difficulty Level:Really Easy
-
Total Repair Time:Less than 15 mins
57 of 64 people
found this instruction helpful.
Was this instruction helpful to you?
Thank you for voting!
Burner was constantly at high heat
I removed the rear cover from the stove then removed the knob and two screws on the front panel that hold the control in place. I then took the wires off the old control one at a time and placed them on the new control. Then I placed the control in position and tightened the two screws on the front panel, replaced the knob and screwed t
... Read more
he back panel in place.
Read less
Parts Used:
-
Rick from Avon Park, FL
-
Difficulty Level:Really Easy
-
Total Repair Time:Less than 15 mins
-
Tools:Pliers, Screw drivers
45 of 49 people
found this instruction helpful.
Was this instruction helpful to you?
Thank you for voting!