


91192712020 Kenmore Range - Overview
Sections of the 91192712020
[Viewing 6 of 6]
Keep searches simple, eg. "belt" or "pump".

Oven Bake Element Push On Terminals 240v
PartSelect #: PS249285
Manufacturer #: WB44T10010
This is an OEM bottom bake element for your oven. Make sure to wait until your oven is cool before replacing this part, and disconnect power to the oven. In order to replace this part, you will need t...
$47.95
In Stock

Range Burner Bowl 8
PartSelect #: PS244399
Manufacturer #: WB31T10015
This part is located beneath the element and catches any spills.
$20.95
In Stock

Range Burner Bowl 6
PartSelect #: PS244398
Manufacturer #: WB31T10014
This burner bowl is also known as a burner drip bowl or burner drip pan, and is designed for use with your cooktop or range. It is black in color and is approximately 6 inches in diameter. It can be f...
$16.95
In Stock

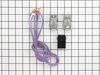
Range Surface Burner Terminal Block Kit
PartSelect #: PS783534
Manufacturer #: WB17T10006
This kit includes the female contact with wires, terminal block and mounting clip.
$33.95
In Stock

Range Burner Switch For 8 Inch Burner
PartSelect #: PS236750
Manufacturer #: WB24T10025
The 8-inch surface element switch is also known as an infinite heat switch, and is a part for your range. It controls the large surface element. It will turn the element on and off, and allow you to c...
$41.95
In Stock

Range Temperature Sensor
PartSelect #: PS10059162
Manufacturer #: WB21X22134
The temperature sensor, also known as the oven temperature sensor assembly is usually found in the back of the oven. The function of the oven temperature sensor assembly is to measure the temperature ...
$28.95
In Stock
 – Part Number: 40A15")
Light Bulb (40W)
PartSelect #: PS217532
Manufacturer #: 40A15
This 40-Watt light bulb is sold individually and is a genuine OEM replacement option for your home appliances. It is specially designed to withstand extreme temperatures, so this bulb is compatible wi...
$19.10
In Stock

Range Rear Support
PartSelect #: PS12709839
Manufacturer #: WB02X33180
This genuine GE drawer support is an original replacement part sourced from the manufacturer and is designed for use with electric ranges. Made of durable plastic, it attaches to the rear of the drawe...
$13.95
In Stock


Range Broil Element
PartSelect #: PS249284
Manufacturer #: WB44T10009
This broil element is found on the upper part of the oven cavity.
$48.95
In Stock

Range Surface Element Control Switch 6 Inch 1560 W
PartSelect #: PS236754
Manufacturer #: WB24T10029
This switch controls the small burner on a range/stove top.
$47.95
In Stock

Burner Bowl - 8 Inch
PartSelect #: PS244397
Manufacturer #: WB31T10013
This burner bowl or drip pan is found beneath the heating element on your cooktop or range. This part measures 8 inches in diameter, and should not be confused with the smaller pan, which measures 6 i...
$35.95
In Stock
Manuals & Care Guides for 91192712020
Click to downloadQuestions And Answers for 91192712020
We're sorry, but our Q&A experts are temporarily unavailable.
Please check back later if you still haven't found the answer you need.
Common Symptoms of the 91192712020
[Viewing 7 of 7]Element will not heat
Fixed by
these parts
these parts


Show All
Little to no heat when baking
Fixed by
these parts
these parts


Show All
Oven not heating evenly
Fixed by
these parts
these parts
Show All
Little to no heat when broiling
Fixed by
these parts
these parts
Show All
Oven is too hot
Fixed by
these parts
these parts
Show All
Will Not Start
Fixed by
these parts
these parts
Show All
Door won’t close
Fixed by
these parts
these parts


Show All


Keep searches simple. Use keywords, e.g. "leaking", "pump", "broken" or "fit".
Bake Element burned out, bunt like a sparkler.
Ordered the part on Friday, got it on Saturday, very impressive. Be sure to unplug the range or disconnect the power at the breaker box before any repairs are started.
The lower (Bake) element is held in by 2 screws. Remove them and gently pull out the element to remove the power wires connected to the element. These wires are ... Read more very short and there is not much room in which to work. After having removed the wire connectors one slipped from my fingers and went back in the small opening in the back of the oven where the element is inserted. It took some time to fish out the wire. Not wanting to slide out the range I used some surgical forcepts I happen to have grab the wire ( handy to clip wires or compontents in place for some delicate repairs). Its all blind and the opening is very small plus the insulation must be pushed back to gain access. Anyway I managed to grab the wire, attached both wires to the element, replaced the plate and screws holding the element in place, all finished. Worked great. Other ranges I have owned provided a socket to plug in the element, I guess the bottom line gets in the way of quality.. Being 60 years old the worst part of this job is the getting down on my knees to do the work and getting back up again.
The lower (Bake) element is held in by 2 screws. Remove them and gently pull out the element to remove the power wires connected to the element. These wires are ... Read more very short and there is not much room in which to work. After having removed the wire connectors one slipped from my fingers and went back in the small opening in the back of the oven where the element is inserted. It took some time to fish out the wire. Not wanting to slide out the range I used some surgical forcepts I happen to have grab the wire ( handy to clip wires or compontents in place for some delicate repairs). Its all blind and the opening is very small plus the insulation must be pushed back to gain access. Anyway I managed to grab the wire, attached both wires to the element, replaced the plate and screws holding the element in place, all finished. Worked great. Other ranges I have owned provided a socket to plug in the element, I guess the bottom line gets in the way of quality.. Being 60 years old the worst part of this job is the getting down on my knees to do the work and getting back up again.
Read less
Parts Used:
-
Brad from Bedford, KY
-
Difficulty Level:Easy
-
Total Repair Time:15 - 30 mins
-
Tools:Pliers, Screw drivers
353 of 377 people
found this instruction helpful.
Was this instruction helpful to you?
Thank you for voting!
Oven would go in to a F2 Error
Removed six 1/4" hex nuts on rear of oven. Then through front/inside removed a single 1/4" hex nut to actually remove sensor. Unplug sensor connector, remove. Reversed steps, push oven back in place and plugged in. Tested oven function.
Parts Used:
-
Peter from stamford, CT
-
Difficulty Level:Really Easy
-
Total Repair Time:15 - 30 mins
-
Tools:Nutdriver
147 of 223 people
found this instruction helpful.
Was this instruction helpful to you?
Thank you for voting!
The switches failed on both front burners.
Remove nobs from both switches.
Pull out the range (the hardest part).
REMOVE THE POWER PLUG FROM THE WALL
Remove 7 screws with nut driver and take off upper back panel.
Remove 2 phillips screws from front, they hold the switch brackets.
The new switches don't fit in the bracket so discard the bracket keeping the ... Read more screws.
Removing 1 wire at a time from the old switch transfer to the new noting the letter/number ie "H1 P1" combos they are all there just not in the same places on the new switch.
When wiring is complete, using the bracket ,screws from the front screw on the switches.
Replace the back panel with 7 screws.
In my case the old nobs did not fit the shafts of the new switches. I found some at the local hardware store. I bought 4 for $0.29 each! I expect to be replacing the other burner switches shortly.
Read less
Parts Used:
-
Marc from Columbia, NJ
-
Difficulty Level:Easy
-
Total Repair Time:15 - 30 mins
-
Tools:Nutdriver, Screw drivers
97 of 105 people
found this instruction helpful.
Was this instruction helpful to you?
Thank you for voting!