EasyApplianceParts is now PartSelect! We've merged our sites to provide a better shopping experience for you.   Full Details
Back
Back
Keep typing for more specific results...
Models > 7MWGD2140JB0 > Symptoms > Drum Not Spinning

Parts That Fix Whirlpool Dryer 7MWGD2140JB0 Drum Not Spinning

Drum Not Spinning is a commonly reported symptom for the 7MWGD2140JB0 Whirlpool Dryer, and we have put together a full guide on how to fix this. This advice is based on feedback from people who own this exact appliance. We have listed the most common parts for your 7MWGD2140JB0 Whirlpool Dryer that will fix Drum Not Spinning. We have included repair instructions, and helpful step-by-step video tutorials. If you are experiencing this issue, not to worry, DIYers just like you have fixed this, and shared their experience to help you!
Fixes Symptom 59% of time

This dryer drum belt (Whirlpool Dryer Belt, Drive Belt) has four ridges, three grooves and is 1/4" wide, and 92 1/4 inches in length. It comes in black and is made of rubber. The belt transfers the rotation of the motor to turn the drum. The belt attaches to the drum, idler pulley, and motor pulley.

$ 14.67
  In Stock
PartSelect Number PS346995
Manufacturer Part Number 341241

Replacing your Kenmore Dryer Dryer Drive Belt

Replacing your Dryer Drive Belt

Customer Repair Stories

Broken belt - drum would not turn
Started out taking the back off, then found online that access is from the front and much easier to get to. Simply pop the hinges in the back of the top panel and then the front of the top is popped off. From there, it is easy to remove the old belt, clean the innards (found 31 cents) and replace the new belt. It was a little disconcerting to see the idler pulley laying loose inside, but the diagram showed exactly how to put it back in place, with the new belt keeping it in place.
  • Gary from Oakland, MD
  • Difficulty Level:
    Really Easy
  • Total Repair Time:
    15 - 30 mins
  • Tools:
    Nutdriver, Screw drivers
87 of 101 people found this instruction helpful.
Was this instruction helpful to you?
Thank you for voting!
broken tumbler belt
1. Removed the screws from the lint catcher
2. Removed the bolts from upper rear of dryer
3. Pried off the dryer top from the front (it rests on rear hinges)
4. Disconnected dryer door wiring
5. Removed bolt from inside upper front corners; removed front panel (be careful: the edges are sharp and the tumbler will fall when it loses support)
6. Removed broken belt and lint from interior parts; removed tensioner (which had fallen out of place). Note: The newer models have a tensioner pulley; my older model had a smooth semicircle that was confusing at first glance
7. Flipped dryer onto its back (for easier reinsertion of new belt and tumbler)
8. Placed new belt on tumbler; reinserted tumbler
9. Inserted new belt through tensioner, inserted tensioner "legs" into grooves on floor. Note: The belt will pull the tensioner upright when it's inserted properly (which isn't obvious at first)
10. Made sure belt and tumbler seal were properly installed
11. Replaced parts in reverse order
The process took over an hour because I couldn't figure out how to insert the belt through the tensioner. The trick is to insert the folded belt through the tensioner and onto the motor pulley. If I had to do it again, it would take about 30 minutes (including cleaning lint)
  • Michael from San Antonio, TX
  • Difficulty Level:
    Easy
  • Total Repair Time:
    30 - 60 mins
  • Tools:
    Screw drivers, Wrench set
141 of 161 people found this instruction helpful.
Was this instruction helpful to you?
Thank you for voting!
Fixes Symptom 23% of time

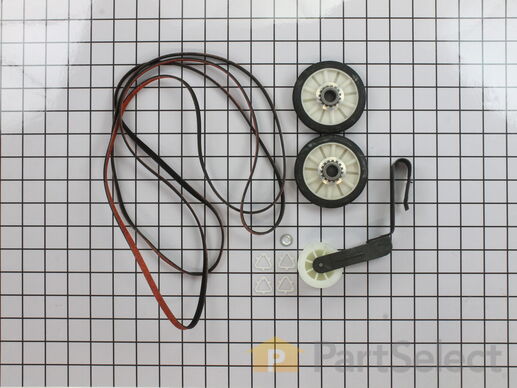
The drum support roller kit (Dryer Repair Kit) allows the dryer to tumble properly by supporting the drum cylinder. The idler pulley provides the tension required for a multi-ribbed belt. The belt attaches to the drum, idler pulley, and motor pulley. If your dryer is damaged, it may be making loud, squeaking, and/or squealing noises while the drum is turning. This is from normal wear and tear. The drum may eventually stop turning all together. This is a sign the part should be replaced. This is one complete maintenance kit. The kit includes the drum belt, drum support rollers, one idler pulley, four tri-rings, and one clip. The parts are constructed of plastic, metal, and rubber, and come in black/white/silver.

$ 34.58
  In Stock
PartSelect Number PS373087
Manufacturer Part Number 4392065

Replacing your Whirlpool Dryer Dryer Maintenance Kit

Replacing your Dryer Maintenance Kit

Customer Repair Stories

Dryer making extra noise while running
1st Unpluged power.
2nd removed two screws under lint screen cover.
3rd poped up lid with flathead screwdryer, then removed (2) 5/16 screws from door cover and unpluged lid switch, lifted up dryer door pannel
4th removed drum
5th took out plastic triangle wheel rings
6th removed old belt guild (to motor pully) ... Read more />7th removed old wheels and plastic rings stops
8th cleaned excessive hair dust with shopvac
9th put new replaicment part in dryer. made sure to turn manually to make sure belt was lined up properly, then put all dryer peices back.
10th aditional work, took back cover off and removed the (4) 1/4 screws for lint screen case (left side in dryer) vacumed out any excessive dirt lint ect, also cleaned any excessive dust I found in back of dryer, dryer , exhaust ect, and put all back together.
JUst like a new dryer aain after all PM was complete.
  • Michael from Haines City, FL
  • Difficulty Level:
    A Bit Difficult
  • Total Repair Time:
    1- 2 hours
  • Tools:
    Nutdriver, Screw drivers, Wrench (Adjustable)
82 of 92 people found this instruction helpful.
Was this instruction helpful to you?
Thank you for voting!
Broken drive belt
Grow a second set of hands. Always unplug any appliance. Remove lint screen. remove two screws (philips Head). I took a wooden shim lightly tapped w/hammer to pop front of dryer top free. Mine worked on hinges and just flipped back til it rested against the wall. Removed two 5/16 screws inside holding face on carefully raise face section off the support clips at either side on the bottom. Pull drum out (I have the large style drum commercial size [approx.). Clean the inside free of all lint (known to be fire hazard). Sling new belt around drum. Get newly grown set of hands to hold drum in place. Pinch belt to fit between tensioner, lift tensioner and place belt around motor pulley. Spin drum couple times to make certain belt isn't twisted. Reverse dismantle proccess to put back together. Replace all parts that come with kit, you'll feel better knowing you got a new dryer, almost.
  • DENNIS from ALTOONA, FL
  • Difficulty Level:
    A Bit Difficult
  • Total Repair Time:
    1- 2 hours
  • Tools:
    Nutdriver, Screw drivers
281 of 308 people found this instruction helpful.
Was this instruction helpful to you?
Thank you for voting!
Fixes Symptom 6% of time

This part provides the tension required for a multi-ribbed belt. It also helps the belt rotate the drum and attaches to the idler pulley wheel. If your dryer will not start or tumble, takes too long to dry, or is noisy during operation, you may need to replace the idler pulley assembly. Make sure to disconnect power before installing this part, and wear work gloves to protect your hands. While the dryer is disassembled for this repair, consider replacing the drive belt as well. You will need a putty knife, a Phillips screwdriver, and a 5/16 nut driver for this repair.

$ 15.68
  In Stock
PartSelect Number PS11743765
Manufacturer Part Number WP691366

Replacing your Kenmore Dryer Dryer Idler Pulley Assembly

Replacing your Dryer Idler Pulley Assembly

Customer Repair Stories

Dryer made a terrible squealing noise
Took a bit to first figure out how to get the front of the dryer off in order to access the motor, wheels, and belt, but found a "how-to" online. Once I had that, the rest was easy.

Lubricated motor and guide wheels but squealing still there. Then noticed the "idler pulley assembly" (the part that keeps the belt tight against the drum) looked a bit old and worn. Ordered a replacement part on this site because it was much much cheaper than a service call, installed it.... and NO SQUEAL!!!
  • Will from Charlotte, NC
  • Difficulty Level:
    A Bit Difficult
  • Total Repair Time:
    15 - 30 mins
  • Tools:
    Screw drivers, Socket set
6 of 8 people found this instruction helpful.
Was this instruction helpful to you?
Thank you for voting!
Busted Dryer Belt
I order a new belt and I watched the video instructions on how to replace it, follow the instructions, removed the top and took out the dryer tumbler or can, found a broken idler pulley, order a new one, got it in about two days, replaced all the parts and now its working like a new dryer, I called several repair shops and I got estimates from $65 to $150, I spend less than $35 and it took me about 35 minutes to install and I got it fixed..
  • Oscar from Dallas, TX
  • Difficulty Level:
    Really Easy
  • Total Repair Time:
    30 - 60 mins
  • Tools:
    Screw drivers
7 of 7 people found this instruction helpful.
Was this instruction helpful to you?
Thank you for voting!
Fixes Symptom 6% of time

The WP8066184 is a dryer motor pulley that is used in some dryer models. It supports the motor belt where it connects with the motor. Symptoms of failure include squealing or grinding noise during drum rotation. Please use the model number of the appliance to check for compatibility before purchasing.

$ 38.95
  In Stock
PartSelect Number PS11744884
Manufacturer Part Number WP8066184

Replacing your Whirlpool Dryer Dryer Motor Pulley

Replacing your Dryer Motor Pulley

Customer Repair Stories

Needed to repair and replace dryer motor pulley and pully
this was very was very easy. But I deviated from the You Tube instructions. One to release the motor pulley. I needed to use 2 adjustable wrenches for a longer lever. I needed to use a hammer to help release pulley. Second to remove the dryer cable I needed to use a small screw driver to aid in the release. ---- the part from the company was a perfect fit.
  • Rob from GAITHERSBURG, MD
  • Difficulty Level:
    Really Easy
  • Total Repair Time:
    30 - 60 mins
  • Tools:
    Wrench (Adjustable)
6 of 6 people found this instruction helpful.
Was this instruction helpful to you?
Thank you for voting!
Replaced a broken pulley.
Half of my pulley was broken off so there were no wrench flats to take it off. I was able to remove it using Channel Locks and the 7/16 wrench shown in the video.

Hint: Use a one gallon ice cream bucket to hold up the drum while connecting the belt. It makes it much easier and gives you more clearance.
  • Brian from IMLAY CITY, MI
  • Difficulty Level:
    Very Easy
  • Total Repair Time:
    15 - 30 mins
  • Tools:
    Nutdriver, Pliers, Screw drivers, Wrench set
10 of 12 people found this instruction helpful.
Was this instruction helpful to you?
Thank you for voting!
Fixes Symptom 5% of time

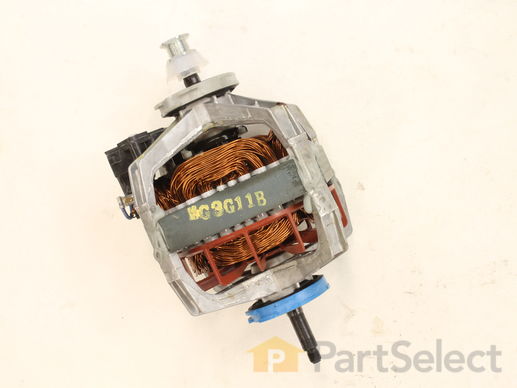
This motor fits most Whirlpool incorporated dryer brands before 1996. NOTE: Pulley is NOT available separately.

$ 92.56
  In Stock
PartSelect Number PS334304
Manufacturer Part Number 279827

Replacing your Kenmore Dryer Dryer Drive Motor w/Pulley

Replacing your Dryer Drive Motor w/Pulley

Customer Repair Stories

had to replace the motor
Follow the advice given in the partsselect website. However, while removing the blower, my hand slipped into the housing and cut my thumb. Connected the wires to the junction box on the motor but didn't realize that the contacts would hit the drum when reinstalled. The original junction box was at a 90 degree rotation relative to the new box. When trying to test the breaker tripped. Using the multitester I found out that I burned out the thermal fuse, and froze the door switch. I replace both those parts and started the dryer and could hear a grinding sound. Inspection revealed that the housing of the motor was rubbing against the drum. Removing the drum yet again, I rotated the housing and replaced the drum. The dryer was finally working well.
  • charles from parker, CO
  • Difficulty Level:
    A Bit Difficult
  • Total Repair Time:
    More than 2 hours
  • Tools:
    Nutdriver, Screw drivers
31 of 43 people found this instruction helpful.
Was this instruction helpful to you?
Thank you for voting!
Make humming noise when pressing start button. Would not start
After looking on the website for advice I walked throught the simple steps of disassembling the front, removing the drum, removed the back, disconnected the wire harness. Then removed the blower housing in the back. The blower, mounted on the back side of the motor was very tight. I used a pipe wrench wedged in place and help by my 10 year old Grand-daughter while I used an adjustable wrench to turn the shaft on the front of the motor. Spun the blower off, removed the two clips holding the motor. Then reversed the process when I received the new motor. Care should be taken to avoid damaging the blower fan if a lot of pressure is required.
  • James from Moscow, IA
  • Difficulty Level:
    Easy
  • Total Repair Time:
    30 - 60 mins
  • Tools:
    Nutdriver, Screw drivers
97 of 111 people found this instruction helpful.
Was this instruction helpful to you?
Thank you for voting!
Fixes Symptom 1% of time

This is a genuine OEM replacement rear drum seal for your dryer. This seal is made of felt and comes with the adhesive required for installation. The purpose of the seal is to prevent hot air from escaping the drum while the dryer is operating. If you notice that it is taking too long for your laundry to dry, that marks are left on your laundry, or the machine is noisy or will not tumble, then you may need to replace the seal.

$ 40.95
  In Stock
PartSelect Number PS8691753
Manufacturer Part Number W10612022

Replacing your Whirlpool Dryer Dryer Drum Felt Seal

Replacing your Dryer Drum Felt Seal

Customer Repair Stories

Aft seal deterioated and causing brown spot on clothing due to netal to metal contact.
Removed top and front of dryer then drum and followed the instructions in the package. It was a real simple procedure. I did additional cleaning while the dryer was disassembled.
  • Cleo from Laurinburg, NC
  • Difficulty Level:
    Easy
  • Total Repair Time:
    1- 2 hours
  • Tools:
    Nutdriver, Screw drivers
11 of 12 people found this instruction helpful.
Was this instruction helpful to you?
Thank you for voting!
Rear Dryer Seal was old and staining clothing
After unplugging the dryer,I removed 2 bolts on the back top of the dryer, then removed the two screws in the lint box area. I used a screw driver to help force the top panel of the dryer up. When open, I removed the top screws that held the front and side panels together. I then lifted the front panel up and away from the dryer, so there would be room to take the drum out. I removed the belt from the pulley (located under the drum) and slid the drum out. I removed the old seal, cleaned up the drum and the inside of the dryer, then glued the new seal on. After the glue was dry, I put the drum back in (with the belt on the drum), put the belt back on the pulley and proceeded to put the dryer front back on. Once the front was on, I put the top back on and replaced the bolts on the back of the dryer. I plugged it in and it is working great! By the way, before this, I had NEVER attempted to repair a dryer before and I am female. If I could do it, so can anyone else willing to try :)
  • Grace from Phoenix, AZ
  • Difficulty Level:
    Easy
  • Total Repair Time:
    30 - 60 mins
  • Tools:
    Screw drivers, Socket set
58 of 65 people found this instruction helpful.
Was this instruction helpful to you?
Thank you for voting!
Fixes Symptom 1% of time

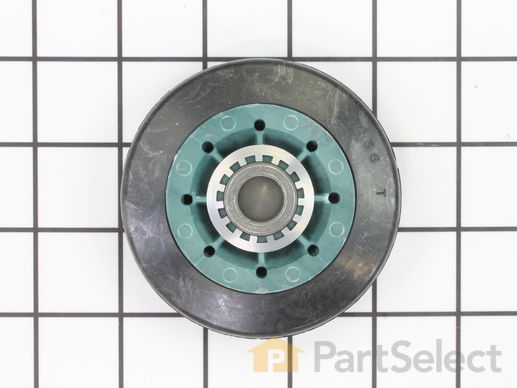
This drum support roller is sold individually. Most dryers require two. The tri-rings are included. This is a drum support roller for a dryer. It is a genuine replacement part. This part is sold separately. Most dryers require two drum rollers. It is recommended to check and replace both drum support rollers at the same time to ensure proper drum rotation and because they often wear at the same rate. The drum support roller holds the drum in the proper position while it spins on the support wheels. If rollers are worn out, they will cause the dryer to be noisy.

$ 18.88
  In Stock
PartSelect Number PS11752609
Manufacturer Part Number WPW10314173

Replacing your Whirlpool Dryer Dryer Drum Support Roller

Replacing your Dryer Drum Support Roller

Customer Repair Stories

A high pitched squeal when drum was rolling.
First my son and I moved the dryer to the garage as we believed there would be a lot of lint possible during disassembly. Used a flat head screwdriver to pop the top from dryer housing. Then removing 2 nuts to facilitate the removal of the front of the dryer. The drum was able to be removed to diagnose the offending drum roller wheel. The drum roller wheel has experienced a failure as it had melted off of the metal spacer. Removing it and replacing with the new one was pretty easy. We then used a shop vac and an air hose to clean out all the lint, coins, paper clips and lost jewelry. Surprisingly there was not a single sock in there. Put it all back together in reverse order and plugged it in and now spins like a dream.
  • Robert from GOODRICH, TX
  • Difficulty Level:
    Easy
  • Total Repair Time:
    30 - 60 mins
  • Tools:
    Nutdriver, Pliers, Screw drivers, Socket set
22 of 24 people found this instruction helpful.
Was this instruction helpful to you?
Thank you for voting!
noisy drum
the job would have gone faster if the right parts had been sent in the first place. I would have never paid for two day shipping. In the repair, I removed the rear panel, clipped the plastic triangle holding the bearing, installed the new bearing and new clip.
  • Jeff from Mesa, AZ
  • Difficulty Level:
    A Bit Difficult
  • Total Repair Time:
    30 - 60 mins
  • Tools:
    Nutdriver, Screw drivers, Wrench (Adjustable), Wrench set
27 of 37 people found this instruction helpful.
Was this instruction helpful to you?
Thank you for voting!
Fixes Symptom 1% of time

This dryer door switch is a simple on/off switch mechanism that prohibits the dryer from operating when the door is open, and operates the drum light. White in color and 6.5 inches long, this OEM switch is comprised of plastic and metal, and features the switch and three wires that comprise the part. Sold individually, this part attaches to the inside of the top end of the front panel. One end attaches to the wiring harness, the other goes through the panel to make contact with the door when the door is closed. Over time, this part can be subject to material fatigue or breakage due to frequent use or rough handling. If it breaks or is defective, you won't be able to start or stop your drying cycle, depending on the position your switch broke in. The easiest way to test this part for functionality is to test it by hand. Push on the black tab that sticks out of the front panel to make contact with your dryer door; if there is no resistance in the tab and it doesn't make a click sound, you may need to replace it.

$ 27.27
  In Stock
PartSelect Number PS11741701
Manufacturer Part Number WP3406107

Replacing your Whirlpool Dryer Dryer 3 Wire Door Switch

Replacing your Dryer 3 Wire Door Switch

Customer Repair Stories

Dryer Would Not Turn Off With Door Open
Pryed dryer top open and opened front door. . Unscrewed the 2 retaining screws. Pulled old switch from the wiring harness. Put new switch in place and replaced the retaining screws. Put new switch wire plug into the wiring harness. Before closing top, checked door switch function with dryer on. Dryer cut off when door open and when closed dryer started normally. . . Maint. Note instruction book should warn that letting door slam, which I did on occaision, broke the switch arm. Might save future problems.
  • RICHARD from NORCROSS, GA
  • Difficulty Level:
    Really Easy
  • Total Repair Time:
    15 - 30 mins
  • Tools:
    Nutdriver, Screw drivers
573 of 594 people found this instruction helpful.
Was this instruction helpful to you?
Thank you for voting!
door switch was bad
i was able to go on line with your company , find my dryer, order the part and had it the next day. fast , great , service
  • pat from lisbon,, OH
  • Difficulty Level:
    Really Easy
  • Total Repair Time:
    15 - 30 mins
  • Tools:
    Screw drivers, Wrench set
1028 of 1085 people found this instruction helpful.
Was this instruction helpful to you?
Thank you for voting!