


7MWFC9822HC1 Whirlpool Washer Dryer Combo - Overview
Sections of the 7MWFC9822HC1
[Viewing 6 of 6]

 Diagram and Parts List for Whirlpool Washer Dryer Combo")


Keep searches simple, eg. "belt" or "pump".

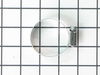
Washer Hose Clamp
PartSelect #: PS11743008
Manufacturer #: WP596669
This hose clamp is used in a wide variety of household appliances. Most often it is found in washers, dishwashers, refrigerators, freezers, dehumidifiers, garbage disposals, or air conditioners. This ...
$7.95
In Stock

Washer Affresh Cleaner
PartSelect #: PS1960673
Manufacturer #: W10135699
Introduce your washing machine to the effective deep clean with the Affresh Washing Machine Cleaner by Whirlpool. Designed to remove and prevent unpleasant odors and stubborn residues, this product br...
$19.95
In Stock

Leveling Leg Locking Nut
PartSelect #: PS11741219
Manufacturer #: WP3359452
The leveling leg locking nut is an OEM replacement fastener for use in dryers and washers. It has a head diameter of 3/8 inches and a thread pitch of 16 threads per inch. The nut secures the leveling ...
$7.95
In Stock
 – Part Number: 350930")
White Appliance Paint (12oz)
PartSelect #: PS347819
Manufacturer #: 350930
Appliance spray paint is a great way to cover up any chips and scratches that have appeared on your appliances. Instead of replacing the part entirely, this is an easy fix. This is also a great way to...
$26.17
In Stock

Washer Hose Clamp
PartSelect #: PS11743289
Manufacturer #: WP616099
Note: This part has been updated by the manufacturer. It may appear different but will still function the same as the original. The hose clamp is about 2 inches in diameter and made of stainless steel...
$8.95
On Order

Washer Hose Clamp
PartSelect #: PS11741854
Manufacturer #: WP356138
This clamp helps to prevent leaking by holding the end of water hose in place.
$9.95
In Stock

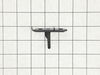
STRIKE
PartSelect #: PS12711619
Manufacturer #: W11316914
Ensure your Whirlpool washing machine functions at its best with our genuine OEM door strike. This essential component is designed to seamlessly fit with specific Whirlpool models. It efficiently acti...
$20.94
In Stock

Boot Seal Retaining Ring
PartSelect #: PS12584490
Manufacturer #: W11266654
This is an OEM boot seal retaining ring for various models of front-load washing machines. This retaining ring is used to clamp down and secure the inner boot, also known as a seal or gasket, of your...
$26.22
In Stock

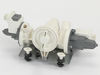
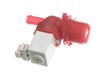
VALVE
PartSelect #: PS17216730
Manufacturer #: W11688995
Introducing the Whirlpool Double Water Inlet Valve. This genuine OEM part is designed for optimal, reliable operation in a variety of washing machines. Not only is this valve perfect for Whirlpool mod...
$69.25
In Stock

Affresh Washing Machine Cleaner Tablets – 6 Count
PartSelect #: PS12345661
Manufacturer #: W10501250
This Affresh Washing Machine Cleaner deep cleans to help remove the odor-causing residues and grime that daily loads leave behind. The time-release tablets are EPA Safer Choice certified, septic-safe ...
$27.95
In Stock

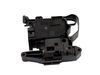
LATCH
PartSelect #: PS16660426
Manufacturer #: W11565030
Genuine OEM door latch for your washer
$44.06
In Stock

Stack Kit
PartSelect #: PS12069913
Manufacturer #: W10869845
Explore the convenience of saving space in your laundry room with the Whirlpool long vent dryer stack kit. Specifically designed to fit a selection of Whirlpool, KitchenAid, Maytag, Jenn-Air, Amana, I...
$63.74
In Stock
Questions And Answers for 7MWFC9822HC1
We're sorry, but our Q&A experts are temporarily unavailable.
Please check back later if you still haven't found the answer you need.
Common Symptoms of the 7MWFC9822HC1
[Viewing 8 of 8]Leaking
Fixed by
these parts
these parts


Show All
Lid or door won’t close
Fixed by
these parts
these parts
Show All
Will not drain
Fixed by
these parts
these parts
Show All
Locking Issues
Fixed by
these parts
these parts
Show All
Water Filling Issues
Fixed by
these parts
these parts
Show All
Does not dispense fabric softener or detergent
Fixed by
these parts
these parts
Show All
Will Not Start
Fixed by
these parts
these parts
Show All
No hot or cold water
Fixed by
these parts
these parts
Show All

Keep searches simple. Use keywords, e.g. "leaking", "pump", "broken" or "fit".
Fabric Softener dispenser would not drain out
Replaced the Whirlpool washer water inlet valve.
1. Unplug washer
2. Close Hot and Cold water valves
3. Remove top cover of the machine by taking out 3 screws in the top back. Slide top back and remove.
4. Water Inlet Valve is located on the back left side, remove tubing using a nutdriver to loosen the hose clamps.
... Read more
/>5. Water Inlet Valve is removed by removing the screw in the back of the valve and turning the valve clockwise a little.
Replace with the new one, connect hoses, put cover back on, open valves, plug it in.
6. Ran washer and Fabric Softener dispenser now works
1. Unplug washer
2. Close Hot and Cold water valves
3. Remove top cover of the machine by taking out 3 screws in the top back. Slide top back and remove.
4. Water Inlet Valve is located on the back left side, remove tubing using a nutdriver to loosen the hose clamps.
Replace with the new one, connect hoses, put cover back on, open valves, plug it in.
6. Ran washer and Fabric Softener dispenser now works
Read less
Parts Used:
-
Frederick from OSWEGO, NY
-
Difficulty Level:Easy
-
Total Repair Time:30 - 60 mins
-
Tools:Nutdriver
14 of 20 people
found this instruction helpful.
Was this instruction helpful to you?
Thank you for voting!
It took two of us to hold the ring and slide it on around the opening with the assistance of screwdrivers the spring was very tight
Two people to screwdrivers, stretching the spring out and around and that’s the last part to go on
Parts Used:
-
Terry from JUPITER, FL
-
Difficulty Level:A Bit Difficult
-
Total Repair Time:Less than 15 mins
-
Tools:Screw drivers
5 of 6 people
found this instruction helpful.
Was this instruction helpful to you?
Thank you for voting!
The hot and cold water flow was slow.
1. First I unplugged the machine.
2. Then I turned off the hot and cold water supply valves.
3. With a towel ready to catch the water, I used channel locks to unscrew the water supply hose from the valve in the back of the machine.
4. Next with 1/4" socket I removed the three screws at the top rear of the machine securing t ... Read more he top cover plate. You could also use a T20 driver.
5. Then I slid the top plate back about an inch and lifted it up to remove it from the machine, being careful with the sharp edges of the plate.
6. Then using my fingers I unclipped the electrical connections to the valve, taking note of how they attached.
7. Warning: I wish someone had told me this! Have a small towel ready to catch any water from the valve hose inside the machine so as not to get any electrical parts wet! I got the machine wet and had to wait a few days to let it dry before it would run water instead of just making a buzzing sound. Luckily it did work again. So with that in mind, I took pliers and squeezed the hose clamp to loosen it and slid it down over the hose.
8. Then using a flathead screwdriver I carefully worked around the hose and pried the hose off of the valve. Again have a small towel ready for the hose to drain onto!
9. Once the hose is drained, I removed the screw on the back of the machine that secured the valve to the machine. I don't remember if it is T20 or Phillips screw.
10. Then I turned the old valve counter clockwise a quarter turn (using channel locks to help me) to release the valve from the two metal tabs holding it in place.
11. I then pulled the old valve out and put the new one in following these steps in reverse order.
12. Don't forget to turn the water back on and plug the machine in! Not that I would ever do such a thing...
Read less
Parts Used:
-
Amber from PICKERINGTON, OH
-
Difficulty Level:Easy
-
Total Repair Time:15 - 30 mins
-
Tools:Pliers, Screw drivers, Socket set
4 of 4 people
found this instruction helpful.
Was this instruction helpful to you?
Thank you for voting!