


7MMVWB835EW0 Maytag Washer - Overview
Sections of the 7MMVWB835EW0
[Viewing 6 of 6]


 Diagram and Parts List for Maytag Washer")


Keep searches simple, eg. "belt" or "pump".

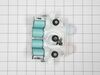
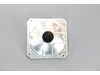
Water Inlet Valve
PartSelect #: PS12348013
Manufacturer #: W11165546
This is an inlet valve for your washing machine. The inlet valve is an electrically controlled valve with a solenoid that opens and closes as needed, during the water filling cycle of the washing mach...
$66.48
In Stock
 – Part Number: 72017")
Refrigerator Touchup Paint (White)
PartSelect #: PS385132
Manufacturer #: 72017
This touch-up paint can be used on a wide variety of household appliances. It is most often used on washers, dryer, refrigerators, dishwashers, ranges, freezers, trash compactors, or microwaves. It is...
$12.58
In Stock

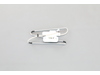
Washer Hose Clamp
PartSelect #: PS11740613
Manufacturer #: WP285655
The hose clamp is used to hold the water hose in place which will prevent the hose from leaking water. Sometimes the clamp may lose its ability to latch on, causing a leaking washer. For the installat...
$9.95
In Stock

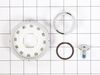
Washer Lid Lock Assembly
PartSelect #: PS11722981
Manufacturer #: W10810403
This lid lock assembly is supplied by the original manufacturer for use in various models of top-load washing machines. The assembly includes the lid lock mechanism and the wiring harness. You can fin...
$77.36
In Stock

Washer Lid
PartSelect #: PS12584356
Manufacturer #: W11259006
This lid is for washers.
The lid covers the washer tub opening.
Wear work gloves to protect your hands when installing this part.
$260.96
In Stock

Washer Affresh Cleaner
PartSelect #: PS1960673
Manufacturer #: W10135699
Introduce your washing machine to the effective deep clean with the Affresh Washing Machine Cleaner by Whirlpool. Designed to remove and prevent unpleasant odors and stubborn residues, this product br...
$19.95
In Stock

Plate
PartSelect #: PS11769534
Manufacturer #: W10902814
This wash plate is for washers
Unplug the washer and shut off the water supply before installing this part
$74.05
In Stock

Plate Screw
PartSelect #: PS10064547
Manufacturer #: W10752187
Introducing the Whirlpool Washer Washplate Screw - your reliable solution for fixing broken or loose washplates in your washing machine. This OEM genuine part, compatible with distinct models of Whirl...
$7.95
In Stock

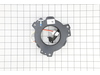
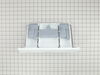
Dispenser Drawer
PartSelect #: PS11770104
Manufacturer #: W10919352
This is a dispenser drawer assembly direct from the manufacturer and used in washing machines. This drawer is made of plastic and features the compartments for bleach, detergent, and softener, for you...
$72.47
In Stock

Drain Hose
PartSelect #: PS12578897
Manufacturer #: W11244231
The drain hose carries used water from the washer to your house drain.
$25.15
In Stock

Impact Absorber
PartSelect #: PS11746560
Manufacturer #: WP8564458
This is an impact absorber, also known as a sound dampening pad, for washing machines. This sound dampening pad attaches to the top of your washing machine drum to reduce the severity and harshness of...
$9.95
In Stock

Questions And Answers for 7MMVWB835EW0
We're sorry, but our Q&A experts are temporarily unavailable.
Please check back later if you still haven't found the answer you need.
Common Symptoms of the 7MMVWB835EW0
[Viewing 13 of 13]Leaking
Fixed by
these parts
these parts


Show All
Lid or door won’t close
Fixed by
these parts
these parts


Show All
Will not agitate
Fixed by
these parts
these parts


Show All
Water Filling Issues
Fixed by
these parts
these parts
Show All
Spinning Issues
Fixed by
these parts
these parts
Show All
Will not drain
Fixed by
these parts
these parts

Show All
Will Not Start
Fixed by
these parts
these parts
Show All
Shaking and Moving
Fixed by
these parts
these parts


Show All
No hot or cold water
Fixed by
these parts
these parts
Show All
Locking Issues
Fixed by
these parts
these parts
Show All
Does not dispense fabric softener or detergent
Fixed by
these parts
these parts
Show All
Noisy and Marks Left on Clothes
Fixed by
these parts
these parts
Show All
Cycle Not Advancing
Fixed by
these parts
these parts
Show All


Keep searches simple. Use keywords, e.g. "leaking", "pump", "broken" or "fit".
Loud grinding noise when the washer was in use.
1.) disconnect power to your washer. Turn off water supply and disconnect from the washer.
open the washer top and remove plastic cap from the wash plate
2.) using 7/16 socket, remove bolt from the wash plate. If you can't remove it with a socket , I recommend using impact wrench.
3.) remove wash plate ... Read more ( you might need to spray penetrating oil or wd40 inside the bolt hole to loosen it.
Check to make sure the wash plate gear grooves are not worn down, if they are, replace it.
4.) using your Maytag specific spaner nut wrench, remove the spaner nut from the shaft of the gear case. This should be right underneath where the wash plate was. If you can't turn it by hand , use a rubber mallet or hammer to encourage it.
5.) some people remove the wash basket at this point. I don't think it is necessary.
6.) close your washing machine. Tape the top closed to keep it from flying open. Tilt your washer back and prop it up where you have access to the underside of the washing machine.
7) remove motor rotor bolt and pull rotor off of the motor.
8.) disconnect the two wire connectors that supply power to motor. using a socket, remove bolts that are keeping motor attached to the gear case.
9.) Now that the gear case is all the is remaining on the underside, you can remove the 4 bolts that are holding the gear case to the washer. Now try to pull gear case out.
10.) if gearcase will not pull out, lower washer back to upright position. Spray penetrating oil or wd40 around the shaft of the gearcase and allow it to sit for 5-10 minutes. Using a hammer, lightly tap on the shaft of the gearcase and it should now fall out. ( you might have to apply penetrating oil again, or apply more force with the hammer.
11.) reinstall motor to new gearcase. Insert new gear case to the washer. Reinstall bolts and reconnect power supply wires.
12. ReInstall spaner nut inside the washer, reinstall wash plate.
Read less
Parts Used:

-
Charles from STARKVILLE, MS
-
Difficulty Level:Easy
-
Total Repair Time:1- 2 hours
-
Tools:Nutdriver, Screw drivers, Socket set
52 of 63 people
found this instruction helpful.
Was this instruction helpful to you?
Thank you for voting!
Broken lid frame at left hinge.
Raised lid to remove two Torx head screws from each hinge. Lid will then lift off of hinges. Installation of new lid was the reverse of the removal procedure. It is best to install one hinge to the lid by removing that hinge from the washer. The lid can then be installed by inserting that hinge into it's spot and then over the other hinge
... Read more
. Install the hinge screws into the second hinge and the job is complete. The lid now closes properly allowing the automatic lid lock to function properly.
Read less
Parts Used:

-
Greg from RICHMOND, VA
-
Difficulty Level:Easy
-
Total Repair Time:30 - 60 mins
-
Tools:Socket set
33 of 36 people
found this instruction helpful.
Was this instruction helpful to you?
Thank you for voting!
Scratches in Surface
This product comes in a bottle with a brush like Liquid Paper. It goes on incredibly easy. A second coat might be needed. I wanted to prevent rust from setting in so I covered the scratches and dings. The paint is a little brighter since my washer is 10 years old but it still looks great.
Parts Used:
-
Michelle from Richardson, TX
-
Difficulty Level:Really Easy
-
Total Repair Time:Less than 15 mins
75 of 181 people
found this instruction helpful.
Was this instruction helpful to you?
Thank you for voting!