


41ADZ2CC799 MTD Trimmer - Overview
Models starting with 41ADZ2CC799
Click on the best match to narrow your results.
Keep searches simple, eg. "belt" or "pump".

Trimmer Fuel Tank Assembly
PartSelect #: PS10009586
Manufacturer #: 753-06183
This fuel tank assembly is supplied by the original manufacturer for use in trimmers. It is responsible for storing and transferring fuel to the engine for combustion. The assembly consists of a plast...
$15.20
Special Order

Trimmer Small Clutch Assembly
PartSelect #: PS9303676
Manufacturer #: 753-05860
This clutch assembly is a genuine OEM replacement kit for outdoor lawn equipment. The kit includes the clutch drum, clutch, clutch washer, and screw. The clutch assembly transfers power from the engin...
$28.58
In Stock

Carburetor
PartSelect #: PS10009632
Manufacturer #: 753-06288
This carburetor is supplied by the original manufacturer as a replacement part for gas trimmers. It is made up of a metal body and plastic choke lever. The carburetor is responsible for mixing air and...
No Longer Available


Trimmer Switch
PartSelect #: PS10014381
Manufacturer #: 791-182405
This Switch is a black, plastic on/off switch for a trimmer. Installation of this manufacturer-certified switch is rated as "Easy" and requires a screwdriver, wrench set and socket set. Refer to your ...
$12.77
In Stock


Common Symptoms of models starting with 41ADZ2CC799
[Viewing 1 of 1]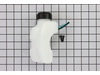

Keep searches simple. Use keywords, e.g. "leaking", "pump", "broken" or "fit".
Fuel line broke
Removed the two screws holding the fuel tank to the main unit. Removed the two fuel lines and any stuck on rubber. Installed and installed two screws to mount the new tank. Slid fuel lines on their respective connectors. Done.
Parts Used:
-
Erik from ROBERTSDALE, AL
-
Difficulty Level:Really Easy
-
Total Repair Time:15 - 30 mins
-
Tools:Screw drivers
12 of 14 people
found this instruction helpful.
Was this instruction helpful to you?
Thank you for voting!
Replace Starter Housing with broken pull cord.
1. Remove Shaft & clutch cover by removing 3 torx screws and loosening cinch bolt.
2. Remove clutch assembly with torx tool in center and then by cinching the shaft and turning spring assembly counter clockwise with an adjustable wrench.
3. Remove starter housing by removing 3 Torx bolts from the front and a screw ... Read more from the back.
4 Reverse the process.
2. Remove clutch assembly with torx tool in center and then by cinching the shaft and turning spring assembly counter clockwise with an adjustable wrench.
3. Remove starter housing by removing 3 Torx bolts from the front and a screw ... Read more from the back.
4 Reverse the process.
Read less
Parts Used:

-
Timothy from GAINESBORO, TN
-
Difficulty Level:Really Easy
-
Total Repair Time:30 - 60 mins
-
Tools:Wrench (Adjustable)
2 of 2 people
found this instruction helpful.
Was this instruction helpful to you?
Thank you for voting!
Super Easy Install
The fuel tank is held in place by 2 screws. Simply take the screws off and pull off the fuel lines.
Take the new fuel tank. Put it in place and screw the 2 screws in to hold the fuel tank.
Connect the fuel lines and you're done.
This is the easiest repair I have ever done on any of my lawn equipment.
Take the new fuel tank. Put it in place and screw the 2 screws in to hold the fuel tank.
Connect the fuel lines and you're done.
This is the easiest repair I have ever done on any of my lawn equipment.
Parts Used:
-
Michael from GLENN HEIGHTS, TX
-
Difficulty Level:Really Easy
-
Total Repair Time:Less than 15 mins
-
Tools:Screw drivers
3 of 5 people
found this instruction helpful.
Was this instruction helpful to you?
Thank you for voting!