Your coupon for will be reflected when you check out!
✖
Your coupon for
✖
Hello!
You're visiting the PartSelect site in U.S.
Would you like to shop on the Canadian site?
Stay on this site
Go to Canadian site
✖
Model Number Locations
1Select Category Type
Select Category Type
2Select Product Type
Select Product Type
3Select {MODEL} Type
Select {MODEL} Type
Sample Model Number Tags
Model numbers can be made up of numbers (1005400, for example) or a combination of letters and numbers (LAT1000AAE). The model number will most likely appear on either a paper sticker or a metal plate. Your appliance's model number tag may look similar to the sample model number tags shown here (model number highlighted in yellow):
Model has been saved to My Models. If you're not signed in, your lists are available on this device and will expire within 30 days.
Model has been saved to My Models.
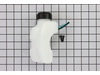
This fuel tank assembly is supplied by the original manufacturer for use in trimmers. It is responsible for storing and transferring fuel to the engine for combustion. The assembly consists of a plast...
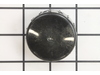
This genuine bump head knob assembly, sometimes known simply as the bump head, is black and approximately 2 inches long. Sold individually, this plastic part releases the cutting line. Over time, this...
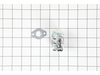
It is an authentic manufacturer-sourced replacement part that i supplied for Craftsman trimmers. The function of a carburetor is to mix the air and the gas into a highly combustible mix before it goes...
This plastic throttle trigger measures 2.5-inches in length and controls the power, speed, and intensity of the motor for your lawn equipment through the throttle cable and carburetor it is attached t...
This spool is for line trimmers.
Spool houses the cutting line and fits inside the cutting head to cut grass and weeds.
Wear work gloves to protect your hands when installing this part.
This Switch is a black, plastic on/off switch for a trimmer. Installation of this manufacturer-certified switch is rated as "Easy" and requires a screwdriver, wrench set and socket set. Refer to your ...
Removed the two screws holding the fuel tank to the main unit. Removed the two fuel lines and any stuck on rubber. Installed and installed two screws to mount the new tank. Slid fuel lines on their respective connectors. Done.
emptied fuel from tank. pulled off the 2 fuel lines from the carburetor.opened the air cleaner door. removed the 2 torque screws that hold on the carburetor. removed the carburetor and air cleaner gasket. installed new carburetor and gasket and put back and tightened the 2 torque screws. closed air cleaner door and pushed the fuel lines o
... Read morento the new carburetor.put some fuel in the tank. started the trimmer. runs great.
The replacement of the carburetor, O-ring, and gasket was simple. I removed 2 screws that held the air cleaner and carburetor in place, swapped them out, and replaced the screws. What took longest was finding a piece of fuel line after breaking one of them. It was brittle after hanging in my garage for several years. I found some in my
... Read more garage and replaced it. It took a few pulls to get it started, but ran very smooth.
Additional information: rather than mixing my fuel, I purchased 40:1 pre-mix fuel to prevent gunking up the carburetor in the future. I use it in my other trimmer and have not had any issues.