Your coupon for will be reflected when you check out!
✖
Your coupon for
✖
Hello!
You're visiting the PartSelect site in U.S.
Would you like to shop on the Canadian site?
Stay on this site
Go to Canadian site
✖
Model Number Locations
1Select Category Type
Select Category Type
2Select Product Type
Select Product Type
3Select {MODEL} Type
Select {MODEL} Type
Sample Model Number Tags
Model numbers can be made up of numbers (1005400, for example) or a combination of letters and numbers (LAT1000AAE). The model number will most likely appear on either a paper sticker or a metal plate. Your appliance's model number tag may look similar to the sample model number tags shown here (model number highlighted in yellow):
Model has been saved to My Models. If you're not signed in, your lists are available on this device and will expire within 30 days.
Model has been saved to My Models.
This 40-Watt light bulb is sold individually and is a genuine OEM replacement option for your home appliances. It is specially designed to withstand extreme temperatures, so this bulb is compatible wi...
The top burner spark electrode, also known as a range surface burner igniter, is designed for use in your gas range. The function of this part is to provide the spark that lights the surface burner. I...
The oven rack is sold individually. It is chrome in color and measures approximately 24 inches wide by 17-1/2 inches deep. The rack is used to hold cookware in the oven and slides back and forth for e...
This burner head, or surface burner, is used in ranges and ovens. The burner sends gas through the holes and slots to create an equal flame across the cooking area. If the gas igniter glows but will n...
This part is the replacement surface burner head for your gas range. It is silver in color and is approximately 3.5 inches in diameter. This burner is sold individually. The burner head distributes ga...
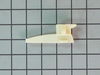
This genuine small burner is an original replacement part from GE, designed for use with a wide range of gas ranges. Positioned between the rangetop and bracket assembly and the burner cap, it plays a...
This Genuine OEM GE Electrode Clip is a precision-engineered component designed for use across a wide range of gas ranges. Constructed from durable metal, the clip plays a critical role in securing th...
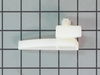
This part is the replacement light socket for your oven. The oven light socket provides power to the light, and at the same time holds the light bulb in place.
This is the replacement left front orifice for your gas range. When your range is operating, gas flows through the orifice to the igniter. This part is the orifice itself as well as the metal holder t...
This part is the replacement burner cap for your gas range. It is made of gray plastic and is approximately 3 inches in diameter. It has 3 small tabs on the bottom, with one tab that is larger than th...
This is a replacement cooktop mounting screw, used to secure the burner. If you are missing that screw on your range, this is the part to replace it. This screw is about a half an inch in length and i...
$13.95
In Stock
Questions And Answers for 36272622302
Be the first to ask our experts a question about this model!
✖
Ask a Question
Ask our experts a question on this model and we'll respond as soon as we can.
First of all disconnect the power cord and then remove the top section of the oven which consisted of 2 small allen screws located in the front bottom corners [ left and right ] on the frontside. On the backside there was 2 phillip screws on top corners [ left and right ]. Also there was 2 bolthead screws that I use my small socket set or
... Read more you can use a small ajustable wrench. Once all these were removed it rolled forward right off. The control board was located in the center of the panel. Made sure the part matched up and it did, removed 4 small corner phillip screws and 4 or 5 removable plug in wire connectors which were easily identified. Put everything back together, plug power cord back in and the electronic display came on. Everything worked on the oven. done deal.
First I needed the correct model number & the correct part numbers for the two front tube assemblies. After that well.... I removed everything on top of the stove. I then proceded to remove all the torx screws for each orifice holder bracket & igniter wires so i could raise the top lid ( without this step you will wind up replacing more t
... Read morehan one tube assembly!) Be careful when removing color coded wires so that they work with the correct burner. Remove compression nut to burner valve... i used a crowfoot. remove orifice holder from bracket & install new holder ( onto bracket). Install orifice assembly to burner valve ( do not over tighten), re-install wires to igniters, lower lid, and re-install torx screws. The correct parts require little effort to align. Last of all, test burners and check for leaks. Thanks for reading, I will continue to learn from my mistakes!


 – Part Number: 40A15")