Your coupon for will be reflected when you check out!
✖
Your coupon for
✖
Hello!
You're visiting the PartSelect site in U.S.
Would you like to shop on the Canadian site?
Stay on this site
Go to Canadian site
✖
Model Number Locations
1Select Category Type
Select Category Type
2Select Product Type
Select Product Type
3Select {MODEL} Type
Select {MODEL} Type
Sample Model Number Tags
Model numbers can be made up of numbers (1005400, for example) or a combination of letters and numbers (LAT1000AAE). The model number will most likely appear on either a paper sticker or a metal plate. Your appliance's model number tag may look similar to the sample model number tags shown here (model number highlighted in yellow):
Model has been saved to My Models. If you're not signed in, your lists are available on this device and will expire within 30 days.
Model has been saved to My Models.
This manufacturer-certified drip bowl is also known as a drip pan, and it is designed for use with cooktops and ranges. It sits below 8-inch burner elements and catches drips and spills from the cookw...
The tools you will need to replace the surface burner receptacle kit on your range include a Phillips screw driver, and a pair of wire strippers. Before doing this repair, make sure to disconnect your...
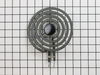
The surface burner or element on your range provides the heat that you cook with. If your element will not heat, you may need to replace the surface burner. This surface burner is 8 inches in diameter...
The standard y-frame surface burner provides heat to your range. If you notice that your element will not heat, you may need to replace your surface burner. This product is 6 inches in diameter, and 1...
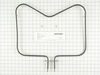
The oven door springs create tension which allows the door to open and close with ease. This spring can be used on either the left or right side of your oven, is made completely of metal, and is appro...
Turned off the power at the breaker box, cut the wires approximately 5 inches from the bad receptacle and removed it after removing one screw. Stripped back the wires about 1/2 inch and attached the new wires with the ceramic wire nuts provided and secured the receptacle back in place with the new screw provided in the kit. My sister
... Read more's husband wanted to scrap the whole range but I repaired it with $14.00 worth of parts. The element is working great now. Whenever I need appliance parts again I'll use partselect.com.
It was so simple to repair - all I had to do was slide the older burners out and slide the new ones in - it took less than 10 min to complete the whole job! No tools used at all.


 – Part Number: WPW10196405")


 – Part Number: WP660532")


")
")
