


2570 - Overview
Models starting with 2570
Click on the best match to narrow your results.
- 2570 (Type 3) Weed Eater Leaf Blower / Vacuum (Electric Blower)
- 2570 (Type 2) Weed Eater Leaf Blower / Vacuum (Electric Blower)
- 2570 (Type 1) Weed Eater Leaf Blower / Vacuum (Electric Blower)
- 2570 (Attachment) Weed Eater Leaf Blower / Vacuum (Gutter Kit)
- 2570 (5316) Braun Epilator (() Silk-Epil EverSoft)
- 2570 Craftsman Miscellaneous (Fixture Dovetail Fixture)
- 2570-DOVETAILFIXTURE Craftsman Router (Dovetail Fixture)
- 2570^40 Whirlpool Range
- 2570^50 Whirlpool Range
- 2570^60 Whirlpool Range
- 2570^70 Whirlpool Range
- 2570^80 Whirlpool Range
- 2570^90 Whirlpool Range
- 2570^A0 Whirlpool Range
- 25700 Hunter Ceiling Fan (Bayport w/Airplane Blades 42" Ceiling Fan)
- 25702 Hunter Ceiling Fan (Bayport w/DotStrip Blades 42" Ceiling Fan)
- 257025 Graco Paint Sprayer (Magnum Project Painter Plus Electric Trueairless Sprayer)
- 25703 Hunter Ceiling Fan (Low Profile IV Plus w/Flower Blades 42" Ceiling Fan)
- 257030 Graco Sprayer (GTX 2000EX Paint Sprayer)
- 25707 Hunter Ceiling Fan (Low Profile IV Plus w/Princess Blades 42" Ceiling Fan)
- 25707 (Type 2) DeWALT Orbital or Palm Sander (31123)
- 25707 (Type 1) DeWALT Orbital or Palm Sander (31123)
- 25708-01 (DC44) Dyson Upright Vacuum (Support For Your Dyson Dc44 Cordless Stick Vacuum)
- 25709 Hunter Ceiling Fan (Low Profile IV Plus w/Surf Blades 42" Ceiling Fan)
- 25709-01 (DC44) Dyson Upright Vacuum (Support For Your Dyson Dc44 Cordless Stick Vacuum)
- 2570B00 Roper Range (Electric)
- 2570B10 Roper Range (Electric)
- 2570B30 Roper Range
- 2570DOVETAILFIXTURE Craftsman Router (Router)
- 2570W0A Roper Range
- 2570W90 Roper Range
- 2570WA0 Roper Range
Keep searches simple, eg. "belt" or "pump".

Sander Carbon Brush
PartSelect #: PS10106782
Manufacturer #: 445861-25
(Sold Individually)
This motor brush is for grinders.
The motor brush transfers electric current to the spinning armature in the motor.
Unplug the grinder before installing this part. Wear work...
$10.25
Special Order

Roller Shaft
PartSelect #: PS11743031
Manufacturer #: WP6-3129480
This roller shaft is also known as a support roller shaft or a drum roller axle, and is a part for your dryer. The function of this piece is to act as the axle for the drum roller; it provides a place...
$9.95
In Stock


Range Surface Burner Plug-In Block Kit
PartSelect #: PS340571
Manufacturer #: 330031
The surface burner plug-in block kit features a newer-style terminal block. This kit is designed for use with ranges and cooktops. This terminal block is how the coil element on your stove connects to...
$15.69
In Stock

 – Part Number: WP660532")
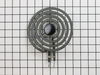
Range Y-Frame Surface Burner (6 In)
PartSelect #: PS11743366
Manufacturer #: WP660532
The standard y-frame surface burner provides heat to your range. If you notice that your element will not heat, you may need to replace your surface burner. This product is 6 inches in diameter, and 1...
$28.32
In Stock


Exact Part matches for your search term
[Viewing 3 of 3]
Axle Pivot Tube
This part number matches the current model number 2570
PartSelect #: PS8937486
Manufacturer #: 2570
No Longer Available
Drive Screw
This part number matches the current model number 2570
PartSelect #: PS10205456
Manufacturer #: 2570
No Longer Available
Drive screw
This part number matches the current model number 2570
PartSelect #: PS16984017
Manufacturer #: 2570
No Longer Available
Common Symptoms of models starting with 2570
[Viewing 5 of 5]Noisy
Fixed by
these parts
these parts

Show All
Element will not heat
Fixed by
these parts
these parts

Show All
Drum Not Spinning
Fixed by
these parts
these parts
Show All
Marks left on clothes
Fixed by
these parts
these parts
Show All
Will Not Start
Fixed by
these parts
these parts
Show All

")


Keep searches simple. Use keywords, e.g. "leaking", "pump", "broken" or "fit".
One burner didn't work all the time the other would go red hot
I unplugged the stove from the outlet, then removed the two burners I was going to be working on and the drip pans. Then I raised the top part of the stove and removed the screws holding the plug-in blocks to the stove. Then I cut the two wires going to the old plug-in block and stripped the wires back to match the new wire parts. Then I
... Read more
placed the sleeves over the new wires, then I placed the new wire beside the wire I stripped on the stove and screw on the wire cap making sure it was tight. I repeated this three more times, once I had all four wires connected I then placed the sleeves over the connections and heated them up until they were formed around the connection. Once I had all the connections done I placed one wire at a time into the plug-in block until it locked into place ( I looked at my old plug-in blocks first to make sure I placed the new wires in the correct way ).I then used the metal mounting bracket that matched my old ones and snapped the correct one onto each plug-in block. Before mounting them onto the stove I compared them to my old ones to make sure they were correct. Then I used the new screws to mount them to the stove. I took a second look at everything I had done before closing the top cover of my stove. After lowering the cover back into place I put both the drip covers in place and then installed the burners.I then plugged the stove back into the outlet and tried the burners. This was very simple and the video on the web site shows this very well which made my job very simple.
Read less
Parts Used:
-
Phillip from Pekin, IL
-
Difficulty Level:Really Easy
-
Total Repair Time:15 - 30 mins
-
Tools:Screw drivers
14 of 15 people
found this instruction helpful.
Was this instruction helpful to you?
Thank you for voting!
Electric burner on stove would not work
The first thing I did was to turn the power off to the stove by turning the Stove circuit breaker off at the Main breaker panel. I next removed the 4 burners by pulling them out of their plug-in blocks. I then removed the four screws that held the top of the stove to the body so I could access the bad plug-in block, the screws were loca
... Read more
ted under each of the burners drip pans. I next removed the screw holding the bad block. I lifted up the top of the stove so as to relocate the bad block, with wires connected, through the opening of the back burner. The bad block was located in the front rt part of the stove and by rerouting this to the back I could lay the top down and have easy access to what I needed to replace. I next used the knife to make a cut down the length of the old shrink tubing so as to gain access to the old splice. I next removed the old wire nuts which allowed the removal of the bad block. I then install the new clips into the new block. I installed one each shrink tubing onto each of the pigtails from the new clips and twisted the one new wire to the stove wiring harnes were the old wire was connected . I connected the seconded wire in the same manner. I pulled on each wire to verify that they were tightly secured together. I then positioned each shrink tubing over each wire nut (you have to fold the wire nut and wires down against the wire so as the shrink tubing will slip over the wire nut) and used a heating tool (hair dryer on high) to shrink the tubing around the wire nutted connection. I next installed the metal clip that would hold the block to the stove top. I placed the new block back to the location where the old block came from and secured it with the new screw provided by the kit. I re-installed the four screws to hold the top down, plugged in the four burners, turned the power on at the breaker box and turned the burner on to test that it work.
Read less
Parts Used:
-
Ronald from Fresno, CA
-
Difficulty Level:Easy
-
Total Repair Time:30 - 60 mins
-
Tools:Screw drivers
5 of 5 people
found this instruction helpful.
Was this instruction helpful to you?
Thank you for voting!
Electric burners where consistently intermittently working right. Sometimes they would work on High but not able to adjust to low heat. Sometimes they would just not want to come on at all. Occasionally there was a spark at the connection. If I jiggled the element just right it may or may not wo
Thought we was going to have to replace the range all together, due to most parts not being available for this model anymore. Since this is an expensive model, we did not look forward to having to replace it. So I thought just by chance I would check to see if anyone had parts to help in repairing it. Part Select did happen to have the
... Read more
Surface Plug-in block kit that was needed. After going at least a year with this problem, I am sooooo happy to say it is finally fixed and working great! Thanks much Parts Select.
Read less
Parts Used:
-
JOAN from Pickford, MI
-
Difficulty Level:Easy
-
Total Repair Time:15 - 30 mins
-
Tools:Screw drivers
6 of 8 people
found this instruction helpful.
Was this instruction helpful to you?
Thank you for voting!