


12560- - Overview
Models starting with 12560-
Click on the best match to narrow your results.
Keep searches simple, eg. "belt" or "pump".

Range Door Handle End Cap
PartSelect #: PS256613
Manufacturer #: WB7X7183
This oven door handle end cap is used on both the left and right hand sides. Sold individually.
$33.95
In Stock

Range Door Handle
PartSelect #: PS231857
Manufacturer #: WB15K5076
This is the replacement door handle for your range. It is made of black plastic and measures approximately 22 inches by 1 inch. The door handle connects to the range door and allows you to open and cl...
$51.36
In Stock

Range Light Cover
PartSelect #: PS247415
Manufacturer #: WB36X192
This light bulb lens covers the interior light bulb in an oven, range, or stove. No tools are necessary to replace this part. Simply slide off the wire bracket to remove the existing light bulb lens. ...
$21.95
In Stock


Porcelain Burner Drip Bowl - 8"
PartSelect #: PS220981
Manufacturer #: PM32X5041
No Longer Available


Snow Blower Washer
PartSelect #: PS10006541
Manufacturer #: 736-0242
Sourced directly from the original manufacturer, this Bell Washer is made of gold-colored metal and is sold individually, not as part of a kit or assembly. It is used to provide spacing between variou...
$5.17
Special Order

Lawn Mower Washer
PartSelect #: PS9311087
Manufacturer #: 936-0119
This Washer-Lock 5/16 is a silver, metal part that is sold individually and comes direct from the manufacturer. With a 5/16 Inch Interior Diameter and 1/2 Inch Outside Diameter, it is used to prevent ...
$4.95
In Stock

Lawn Mower Carriage Bolt
PartSelect #: PS9088287
Manufacturer #: 710-0260A
This genuine OEM carriage bolt is used to secure various parts in lawn and garden outdoor equipment. The bolt has a round head with a square area underneath it that prevents the bolt from turning and ...
$4.71
In Stock

Common Symptoms of models starting with 12560-
[Viewing 2 of 2]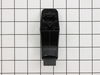

Keep searches simple. Use keywords, e.g. "leaking", "pump", "broken" or "fit".
The end caps broke on my oven door handle.
1st I opened the oven door and removed the 2 screws that hold the outside and inside of the door together. With the door separated I removed the 2 screws that hold the end caps in place, then removed the old end caps. I put the new end caps on the oven door handle, aligned the holes for the end cap screws and reinstalled the screws,then
... Read more
reinstalled the oven door screws,closed the oven door and started cooking.
Read less
Parts Used:
-
Harry from Thomasville, GA
-
Difficulty Level:Easy
-
Total Repair Time:15 - 30 mins
-
Tools:Screw drivers
45 of 46 people
found this instruction helpful.
Was this instruction helpful to you?
Thank you for voting!
handle on range was broken
1] removed door and put it on bench
2] removed two[2] screws to open up face of door
3] wedged aa 2" x 4" between face of door and back of door
4] used nut-driver to remove the damaged end-cap [this part holds the stove handle in place]
5] put handle on one side to good end-cap and slipped new end-cap on handle and pu ... Read more t it opening where old end-cap came off
6]screwed in new part and screwed together face and back of oven door
7] put door back on oven
Read less
Parts Used:
-
nancy from rochester, NY
-
Difficulty Level:Really Easy
-
Total Repair Time:15 - 30 mins
-
Tools:Nutdriver, Screw drivers
15 of 19 people
found this instruction helpful.
Was this instruction helpful to you?
Thank you for voting!
Oven door handle and end caps were broken
Removed screws in door and pulled apart inside and outside, broken plastic pieces fell everywhere. Removed interior screws that held the end caps for the handle. Put the new end caps and handle together, placed on door and screwed in the interior screws to hold handle. Pushed inside and outside of door together and replaced screws. It
... Read more
appears that there were spaces on those screws that correctly placed the inside and outside which were broken to shreds. I could not find those on the the parts list so the door is not as good as it should be.
Read less
Parts Used:
-
Carol from Southaven, MS
-
Difficulty Level:Easy
-
Total Repair Time:Less than 15 mins
-
Tools:Screw drivers
10 of 13 people
found this instruction helpful.
Was this instruction helpful to you?
Thank you for voting!