


1145 - Overview
Models starting with 1145
Click on the best match to narrow your results.
- 1145 (Before 1999) Wilton Vise (Drill Press Vise)
- 1145-B-1999 (63242) Wilton Vise (Wilton 63242(1145-B-1999) Parts)
- 11450 Troy-Bilt Trimmer (Elite (8'x6') Greenhouse)
- 11450-3 General Electric Range
- 1145000 Whirlpool Microwave
- 1145001 Maytag Microwave
- 11453-01 (DC07) Dyson Upright Vacuum (Support For Your Dyson Dc07 Upright Vacuum)
- 11458 (Type 1) Black and Decker Electric Drill (4.8 Volt Screwdriver)
Keep searches simple, eg. "belt" or "pump".

Range Burner Bowl 8
PartSelect #: PS244399
Manufacturer #: WB31T10015
This part is located beneath the element and catches any spills.
$20.95
In Stock

Range Burner Bowl 6
PartSelect #: PS244398
Manufacturer #: WB31T10014
This burner bowl is also known as a burner drip bowl or burner drip pan, and is designed for use with your cooktop or range. It is black in color and is approximately 6 inches in diameter. It can be f...
$16.95
In Stock

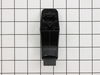
Range Door Handle End Cap
PartSelect #: PS256613
Manufacturer #: WB7X7183
This oven door handle end cap is used on both the left and right hand sides. Sold individually.
$33.95
In Stock
 – Part Number: 40A15")
Light Bulb (40W)
PartSelect #: PS217532
Manufacturer #: 40A15
This 40-Watt light bulb is sold individually and is a genuine OEM replacement option for your home appliances. It is specially designed to withstand extreme temperatures, so this bulb is compatible wi...
$19.10
In Stock

Dryer Screw
PartSelect #: PS11746840
Manufacturer #: WP90767
This screw is sold individually.
$7.95
In Stock

Range Door Handle
PartSelect #: PS231857
Manufacturer #: WB15K5076
This is the replacement door handle for your range. It is made of black plastic and measures approximately 22 inches by 1 inch. The door handle connects to the range door and allows you to open and cl...
$51.36
In Stock

Range Heat Resistant Adhesive
PartSelect #: PS11728058
Manufacturer #: W10841140
This is a heat-resistant adhesive for your appliance. The heat resistance allows you to stick parts such as grate feet, gaskets, and felt seals in hot areas, such as a cooktop, without compromising th...
$17.95
In Stock

Range Hex Nut
PartSelect #: PS11742711
Manufacturer #: WP488130
This hex nut is an authentic Whirlpool part that is sourced directly from the original equipment manufacturer, and will fit a variety of appliances including ovens, microwaves, refrigerators, air cond...
$8.95
In Stock


Door Gasket
PartSelect #: PS241985
Manufacturer #: WB2X2058
Introduce an easy fix to your kitchen with this GE genuine replacement gasket. Designed specifically for GE range/stove/oven, it ensures a reliable door seal, minimizing heat loss and fostering energy...
$99.86
In Stock
Exact Part matches for your search term
[Viewing 5 of 5]
Washer, Plain .632 x 1.00 x .060
This part number matches the current model number 1145
PartSelect #: PS8846287
Manufacturer #: 1145
No Longer Available
Washer, Plain, .632 x 1.00 x .060
This part number matches the current model number 1145
PartSelect #: PS8847117
Manufacturer #: 1145
No Longer Available
Washer
This part number matches the current model number 1145
PartSelect #: PS9882645
Manufacturer #: 1145
No Longer Available
Washer, Plain, .632 x 1.00 x .060
This part number matches the current model number 1145
PartSelect #: PS9882646
Manufacturer #: 1145
No Longer Available
Wire harness
This part number matches the current model number 1145
PartSelect #: PS12182590
Manufacturer #: 1145
No Longer Available
Common Symptoms of models starting with 1145
[Viewing 3 of 3]Leaking
Fixed by
these parts
these parts

Show All
Element will not heat
Fixed by
these parts
these parts
Show All
Door won’t close
Fixed by
these parts
these parts
Show All


Keep searches simple. Use keywords, e.g. "leaking", "pump", "broken" or "fit".
The end caps broke on my oven door handle.
1st I opened the oven door and removed the 2 screws that hold the outside and inside of the door together. With the door separated I removed the 2 screws that hold the end caps in place, then removed the old end caps. I put the new end caps on the oven door handle, aligned the holes for the end cap screws and reinstalled the screws,then
... Read more
reinstalled the oven door screws,closed the oven door and started cooking.
Read less
Parts Used:
-
Harry from Thomasville, GA
-
Difficulty Level:Easy
-
Total Repair Time:15 - 30 mins
-
Tools:Screw drivers
45 of 46 people
found this instruction helpful.
Was this instruction helpful to you?
Thank you for voting!
The gasket needed to be replaced in top oven, it was brittle and broken.
We took out the philips screws on the right and left side of inside of the oven and two hex head screws on the clip on the top of the oven in the front. Then using a slot screw driver pryed the oven liner out enough to remove old gasket and replace the new gasket. We did see in some online directions that we were suppose to remove enti
... Read more
re oven from cabinet and loosen bolts in the back. But, we were able to get enough space to get the old gasket out and new one installed. We did use a 1/4" thick piece of wood on face of oven to prevent any denting of oven when prying out the liner of the oven.
Read less
Parts Used:
-
JoAnn from Auburn, WA
-
Difficulty Level:Easy
-
Total Repair Time:15 - 30 mins
-
Tools:Screw drivers
19 of 27 people
found this instruction helpful.
Was this instruction helpful to you?
Thank you for voting!
handle on range was broken
1] removed door and put it on bench
2] removed two[2] screws to open up face of door
3] wedged aa 2" x 4" between face of door and back of door
4] used nut-driver to remove the damaged end-cap [this part holds the stove handle in place]
5] put handle on one side to good end-cap and slipped new end-cap on handle and pu ... Read more t it opening where old end-cap came off
6]screwed in new part and screwed together face and back of oven door
7] put door back on oven
Read less
Parts Used:
-
nancy from rochester, NY
-
Difficulty Level:Really Easy
-
Total Repair Time:15 - 30 mins
-
Tools:Nutdriver, Screw drivers
15 of 19 people
found this instruction helpful.
Was this instruction helpful to you?
Thank you for voting!