Your coupon for will be reflected when you check out!
✖
Your coupon for
✖
Hello!
You're visiting the PartSelect site in U.S.
Would you like to shop on the Canadian site?
Stay on this site
Go to Canadian site
✖
Model Number Locations
1Select Category Type
Select Category Type
2Select Product Type
Select Product Type
3Select {MODEL} Type
Select {MODEL} Type
Sample Model Number Tags
Model numbers can be made up of numbers (1005400, for example) or a combination of letters and numbers (LAT1000AAE). The model number will most likely appear on either a paper sticker or a metal plate. Your appliance's model number tag may look similar to the sample model number tags shown here (model number highlighted in yellow):
Model has been saved to My Models. If you're not signed in, your lists are available on this device and will expire within 30 days.
Model has been saved to My Models.
Introduce your washing machine to the effective deep clean with the Affresh Washing Machine Cleaner by Whirlpool. Designed to remove and prevent unpleasant odors and stubborn residues, this product br...
$19.95
In Stock
Order now and your part arrives in 2-3 business days!
This Affresh Washing Machine Cleaner deep cleans to help remove the odor-causing residues and grime that daily loads leave behind. The time-release tablets are EPA Safer Choice certified, septic-safe ...
$27.95
In Stock
Order now and your part arrives in 2-3 business days!
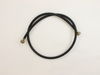
Open the top of the washing machine by using a putty knife to release the latches at the right and left side. Prop up the top so it doesn't fall while working. Remove the inlet hoses and put in bucket to catch water. Remove the two screws that hold the inlet valve in place. Remove the wires from the inlet valve. (One of t
... Read morehe spade connectors one wire broke and I had to replace it.) I used needle nose pliers to pull the spade connectors off. Remove the outlet hose. Throw out old valve assembly. Attach hose to new valve assembly. (My old valve assy outlet was slightly smaller in diameter than the new valve, but I was able to get the outlet hose to stretch enough to fit--couldn't use old spring clamp though, but new valve came with a hose clamp--worked fine.) Attach wires same way as they cam off old valve. Position and use the two screws to screw assy back into back of washing machine. (The screws had to tap the holes on the valve, so start out a little hard.) Reattach the inlet hoses and check for leaks. I also ran both the hot and cold in a cycle and the reraised the top to check for any leaks internal to the machine. Pus the top back down to engage its fastening clips. Job done. My washing machine is 23 years old.
First I unplugged the machine, then turned the water supply off in order to disconnect the hoses at the back of the machine. Next I pulled the top up and leaned it back so I could access the water valve at the rear of the machine (You might have to use a screw driver to pry the top off the pins which hold it down in front...). I then un
... Read morescrewed the the valve and disconnected the wiring and, in order, re-connected to the new valve. Now reverse and turn on the water and yes, the new valve fixed the hot water problem. We can now do the "whites".
I read some stuff on the internet where folks with the same problem replaced the water inlet valve to repair this same problem. So I did the same. However, after I installed the new water inlet valve, the problem was still there. It was at that point I decided not to guess at the what issue was and instead test the components in the wa
... Read moresher. Yes, I am a lazy dumb ass. There are many of us out there. I decided to use a continuity tester to test all components in the hot water fill circuit and determined that the water temperature switch was bad. So I ordered a new switch from Parts Select (they rock - it showed up next day) replaced the water temperature control switch and...walla. fixed!!! Only took about 30 minutes to replace. Lesson learned: Don't be a dumb ass and guess. Test.


 – Part Number: W10355053")