Your coupon for will be reflected when you check out!
✖
Your coupon for
✖
Hello!
You're visiting the PartSelect site in U.S.
Would you like to shop on the Canadian site?
Stay on this site
Go to Canadian site
✖
Model Number Locations
1Select Category Type
Select Category Type
2Select Product Type
Select Product Type
3Select {MODEL} Type
Select {MODEL} Type
Sample Model Number Tags
Model numbers can be made up of numbers (1005400, for example) or a combination of letters and numbers (LAT1000AAE). The model number will most likely appear on either a paper sticker or a metal plate. Your appliance's model number tag may look similar to the sample model number tags shown here (model number highlighted in yellow):
Model has been saved to My Models. If you're not signed in, your lists are available on this device and will expire within 30 days.
Model has been saved to My Models.
This an authentic OEM 40-Watt replacement light bulb, used in a number of household appliances. It is specially designed to withstand extreme temperatures, which is why these replacement bulbs are mos...
$17.80
In Stock
Order now and your part arrives in 2-3 business days!
Cycling themostats continually cycle the heating element off and on to maintain a constant inner temperature within the dryer. This particular cycling thermostat can be adjusted between 135 and 155 de...
$45.95
In Stock
Order now and your part arrives in 2-3 business days!
This part is the replacement single front panel clip for your dryer. It is made of metal and is approximately 2 inches long and ¾ inch wide. The front panel retainer clip is what holds the front panel...
$15.73
In Stock
Order now and your part arrives in 2-3 business days!
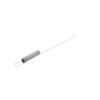
This dryer door cable is intended for use with spring part number PS343422. This cable is compatible with many of Whirlpool/Kenmore's brands of gas and electric clothes dryers.
1. Remove the lint filter. Then remove 2 screws at the lint filter housing.
2. At the back of the dryer, remove 2 screws that restrain the hinges for the dryer top. Do NOT remove the hinges.
3. Remove the front lower access panel. It snaps at the top and hinges at the bottom. It can be slipped off the hinges.
... Read more/> 4. Remove 2 screws at the bottom of the main front panel
5. The front of the dryer top is held in place by two plastic clips. Use a flat blade screwdriver (with a rag wrapped around the tip to minimize paint damage) to pry the top up at each front corner. Then tilt the top up to just past vertical. You now can see the top of the spring that is connected to the door cable.
6. Open the dryer door. Use a putty knife to pry up the plastic plug that holds the cable in place at the door. Remove the old cable from the door and insert the new one. Be sure the cable end without a hole goes into the dryer door. Replace the plastic plug.
7. Feed the new cable through the main front panel and close the door.
8. Loosen but do NOT remove two screws that hold the main front panel to each side panel. Tilt the bottom of the front panel out about 2 inches.
9. Working through the gap between the main front panel and the side, hook the spring into the hole in the cable end.
10. Working through the open top and the gap on the side, move the spring+cable up to the top. Pass the upper end of the spring through the rectangular hole in the top of the main front panel and hook the end into the small hole there.
11. Repeat for other cable as needed.
12. Reassemble all parts. You may need to hold the top of the drum up as you move the main front panel back into place. Install the main front panel lower screws before tightening the upper screws.
Took off back cover, thermostat was easily identified because of photos I've seen on website. Took 2 connectors off, removed 2 screws and removed old thermostat. That was pretty much it!
NOTE: Replacement thermostat 694674 has an adjustable temperature range setting that MUST be manually set prior to installing! You need to use
... Read more the enclosed chart to find your original part# and make sure the setting is matched. My original part# 341146 had a "D" setting so I had to change but very easy to do.
First I unplugged the dryer for safety, then I removed the top of the dryer, then removed the 2 hex head screws holding the font door panel onto the dryer. Then I disconnected the door safety switch. the rest was cake. I removed the old bearing and cut the new bearing and seal to the exact size of the old one. I used contact cement to gl
... Read moreue the new bearing and seal into place. Reassembly was a breeze. End of job. Success!!!


 – Part Number: 8009")


")


