Your coupon for will be reflected when you check out!
✖
Your coupon for
✖
Hello!
You're visiting the PartSelect site in U.S.
Would you like to shop on the Canadian site?
Stay on this site
Go to Canadian site
✖
Model Number Locations
1Select Category Type
Select Category Type
2Select Product Type
Select Product Type
3Select {MODEL} Type
Select {MODEL} Type
Sample Model Number Tags
Model numbers can be made up of numbers (1005400, for example) or a combination of letters and numbers (LAT1000AAE). The model number will most likely appear on either a paper sticker or a metal plate. Your appliance's model number tag may look similar to the sample model number tags shown here (model number highlighted in yellow):
Model has been saved to My Models. If you're not signed in, your lists are available on this device and will expire within 30 days.
Model has been saved to My Models.
The direct drive drain pump (Whirlpool Direct Drive Washer Pump, Drain Pump, Washer Drain Pump, Water Pump) removes water from the washer during the drain cycle without the use of a belt. The pump is ...
$41.95
In Stock
Order now and your part arrives in 2-3 business days!
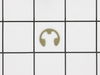
The suspension spring supports the outer tub and keeps the tub steady during loads that could cause an unbalance. If this part breaks, is worn down or has stretched out and lost its spring, it could c...
$10.45
In Stock
Order now and your part arrives in 2-3 business days!
This tub spring is also known as suspension spring, balance spring, or counterweight spring. It is sold individually. The function of the part is to counterbalance the weight of the motor on the front...
$6.95
In Stock
Order now and your part arrives in 2-3 business days!
This hose clamp is used in a wide variety of household appliances. Most often it is found in washers, dishwashers, refrigerators, freezers, dehumidifiers, garbage disposals, or air conditioners. This ...
$7.95
In Stock
Order now and your part arrives in 2-3 business days!
This part may also be referred to as a main outer tub seal. This part prevents leaking from the bottom of the tub. The gasket is approximately 2 inches in diameter to the outer edge, black in color, a...
$7.95
In Stock
Order now and your part arrives in 2-3 business days!
The front facing foot is sold individually. It is used on your washing machine and can also be known as an adjustable leveling leg. This specific front facing leveling leg has a rubber foot. It is imp...
$6.95
In Stock
Order now and your part arrives in 2-3 business days!
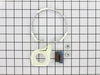
1. Unplug washer. 2. Remove screws at control panel end caps. 3. Flip control panel back to expose wiring. 4. Detach lid switch wiring harness from control panel. 5. Use screwdriver to pry the 2 brass clips holding the back panel of the washer to the front and sides piece. 6. Tilt the front/sides piece over to exp
... Read moreose lid switch. 7. Use nutdriver to detach ground wire. 8. Use screwdriver to remove 2 screws holding lid switch in place. 9. Install new lid switch. Make sure wiring harness piece is facing the right direction. 10. Put washer back together in same order it was disassembled. Make sure front/sides piece connects to the clips at the bottom.
The hardest part of this job was pulling the machine away from the wall so the hoses could be disconnected and the machine flipped onto it's back. Putting the machine on it's back does two things. It drains the water left in the bottom of the tub so it won't pour out onto the motor when the old pump is removed, and gives the necessary a
... Read moreccess to the pump. Once the machine is on it's back you remove the hose clamps with a pair of pliers and disconnect the hoses. The pump is secured to the motor with a pair of spring steel retaining clips which are easily popped off by hand. Once the clips are removed, the pump is in your hand. Put the new pump in place, replace the retaining clips and hoses, and you're done. This has to have been the easiest repair I've ever done. I wish cleaning gutters was this easy.
First I unplugged the washing machine. Then I removed the two screws that hold the top console in place; these are located in back of the main console (where the dials are). Once removed, the entire console swivels back, exposing the wires underneath. I unplugged the wiring harness that was connected to the washing machine top flat sur
... Read moreface. I then removed the two s-shaped brackets with a screwdriver by prying underneath. This allowed me to remove the main sheet metal frame around the washing machine. The lid switch assembly is located under the top console. I simply removed it and replaced with the new assembly and put it back together. A snap!


 – Part Number: 285744")