Parts That Fix Kenmore Refrigerator 10656532400 Ice maker not making ice
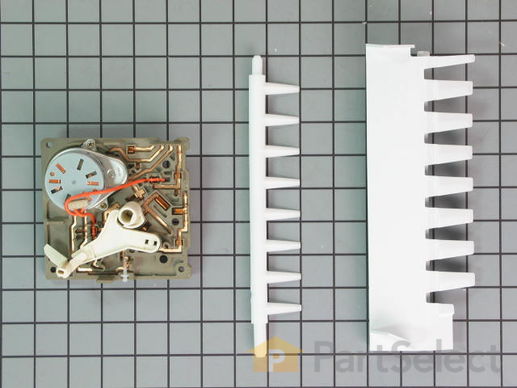
The “Icemaker Control Assembly” (Module & Motor Assembly, Ice Maker Control Module, Icemaker Module, Refrigerator Ice Maker Module) is what controls the actions of your ice maker. The control turns the timing cams and the ejector blades. It controls most of the basic parts and functions such as the heater, water inlet valve, the cube size, and cube ejection. If your ice maker control is broken it can no longer properly control the ice maker functions. It may not produce any ice, make small ice cubes, or have intermittent operation. This can occur due to normal wear and tear. The icemaker control assembly is attached to the ice maker mold, and is under the white cover. Test the icemaker control assembly by using a multimeter. If this reveals the assembly to be defective, you will need to replace this part. It is approximately 4.25 inches square, beige, and is constructed of plastic and metal. This replacement part features one icemaker control assembly, including the control module and the motor.
Replacing your Kenmore Refrigerator Ice Maker Control Assembly

Customer Repair Stories
Pulled off white plastic end-cap and noticed the plastic gear disk had snapped off (sub part # R0167202)
However, it is all-one-part of the motor assembly unit # w10190935 (part # PS2341896) which must be ordered as a complete part.
Unscrewed the motor assembly (3 screws) with phillips head screw driver.
Screwed in the new unit.
Placed ice maker back into location and tightend the bacing srews.
1 hour later ice was falling!
-
Robert from Port Washington, NY
-
Difficulty Level:Really Easy
-
Total Repair Time:15 - 30 mins
-
Tools:Screw drivers, Socket set
-
Daniel from Suwanee, GA
-
Difficulty Level:Easy
-
Total Repair Time:15 - 30 mins
-
Tools:Screw drivers, Socket set
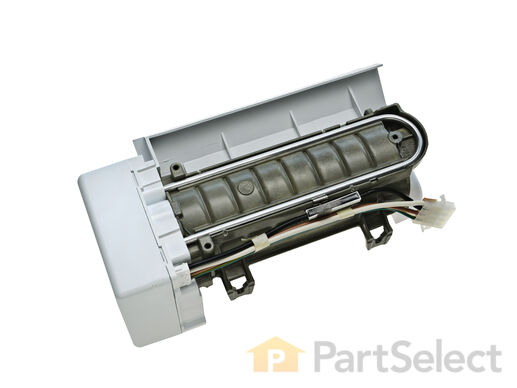
This Ice Maker (Icemaker Assembly, Complete Icemaker Assembly, Ice Maker Assembly, Refrigerator Ice Maker) can be used with 25-27 cubic feet refrigerators that have a vertical auger dispenser located on the freezer door. It’s used to make ice. When this part fails, no ice cubes will be made. It could prevent the icemaker from filling with water or just prevent the harvesting of the ice cubes. This is a sign the part should be replaced. The parts electrical contacts and motor can fail due to normal wear and tear. The icemaker attaches to the ceiling of the freezer compartment. This assembly measures 11 inches by 5 inches, is constructed of plastic and metal, and comes in black/white.
Replacing your Whirlpool Refrigerator 8 Cube Ice Maker Assembly

Customer Repair Stories
-
James from Puyallup, WA
-
Difficulty Level:Really Easy
-
Total Repair Time:15 - 30 mins
-
Tools:Nutdriver, Screw drivers
-
Phil from Auberry, CA
-
Difficulty Level:A Bit Difficult
-
Total Repair Time:15 - 30 mins
-
Tools:Nutdriver, Screw drivers
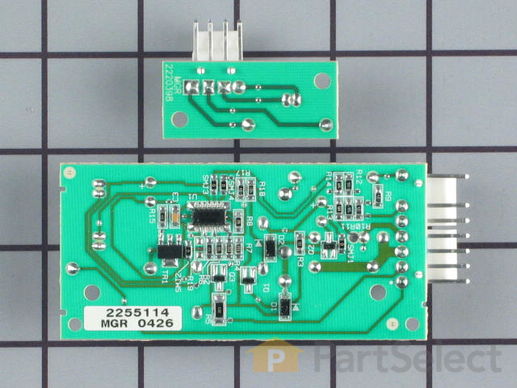
This set of two electronic control boards contains both the emitter and the receiver. These boards tells the icemaker when it's full and that it has to dump the ice, and it also tells the icemaker when to refill with water.
Replacing your Kenmore Refrigerator Electronic Control Board

Customer Repair Stories
-
Thomas from Riverside, CA
-
Difficulty Level:Really Easy
-
Total Repair Time:Less than 15 mins
-
Tools:Screw drivers
-
Vince from El Cajon, CA
-
Difficulty Level:Really Easy
-
Total Repair Time:Less than 15 mins
-
Tools:Screw drivers
The water inlet valve (Refrigerator Water Inlet Valve Kit) provides water for the ice maker and water dispenser. This part is located at the back of the refrigerator, and connects to the water supply. If your water inlet valve is malfunctioning, you could be getting a lack of water to the inside of your refrigerator. Your ice maker may not produce cubes or your water dispenser may not work. This breakage can occur from material fatigue or normal use, and is a sign the part should be replaced soon. The water inlet valve must be replaced if the solenoids no longer have continuity or the valve has internal blockage. The part measures approximately 6.5 inches long and 3 inches wide and is constructed of plastic and metal. It comes in blue/green/red.
Replacing your Whirlpool Refrigerator Refrigerator Water Inlet Valve

Customer Repair Stories
The valve was the new style where you push in the tubing until it locks. I carefully trimmed each tube square with a sharp razor knife, the old valve used plastic compression fittings which had to be cut off.One of the inlet tubes was smaller than the opening on the valve. I then noticed that there was a reducer in the box that snapped into place making the line a perfect fit! Even though the inlet valve looked different than the original it was an easy installation. After replacing it, I had ice again! Totally impressed with the service and how quickly they shipped the parts on the same day! I will never again run around town trying to find parts! Thanks to all of the hard working employees at Part Select!
-
Jerry from Cooper City, FL
-
Difficulty Level:Easy
-
Total Repair Time:30 - 60 mins
-
Tools:Nutdriver, Screw drivers
-
Mark from Wolfeboro, NH
-
Difficulty Level:Easy
-
Total Repair Time:15 - 30 mins
-
Tools:Pliers, Socket set, Wrench (Adjustable)
This kit includes the module motor, ejector arm, and ice stripper arm. The complete icemaker is sold separately.
Replacing your Whirlpool Refrigerator Icemaker Motor Kit

Customer Repair Stories
-
George from Hammond, LA
-
Difficulty Level:Really Easy
-
Total Repair Time:Less than 15 mins
-
Tools:Screw drivers
1.) Went to KitchenAid website to look at Parts List for my ... Read more side-by-side refrigerator and ice maker assembly (a PDF file, easily downloadable) . The illustrations helped me visualize the assembly and various parts involved.
2.) Removed cover on front of ice maker.
3.) Removed hex-head screw on undersurface of icemaker on the right, which stablilizes a plastic cover for the electrical connector to the ice maker. Once this is off, it's then possible to slide the ice maker out.
4.) Slide the ice maker out from it's 'shelf' in the freezer. You won't be able to completely remove it until you disconnect the power supply.
5.) Disconnect the multi-pin power connector. (It's probably safest to unplug the refrigerator altogether before doing this, but I did not. No exposed metal wiring or connectors. No problems when I did it this way.)
6.) Once the ice-maker was out, remove the white cover from the motor assembly (on the left side of the unit).
7.) Remove the three screws from the black housing of the motor assembly. (This is where I discovered that the connector between the motor and drive-train was broken and needed to be replaced.)
8.) Remove and replace the drive system for the ice cube ejector.
9.) Then reverse the steps to reassemble.
This may seem a bit vague, but it's really quite straightforward once the ice maker is out of the freezer. The replacement motor assembly includes the motor, the motor housing, the drive-train, and the ice-cube ejector. Very easy to re-asemble.
Shopping for and ordering the part took some time since there are so many different after-market parts dealers. In all honesty, I'm glad I decided on PartSelect.com. They had a decent price, safe checkout, and timely delivery. All the essentials of a good online store.
Thanks, and good luck to the next guy who has to deal with a KitchenAid snafu.
-
ANDREW from DURANGO, CO
-
Difficulty Level:A Bit Difficult
-
Total Repair Time:30 - 60 mins
-
Tools:Nutdriver, Screw drivers
The ice maker thermostat, also known as the cycling thermostat, controls and regulates the ice maker ejection cycle by monitoring the temperature inside the freezer to determine when to release the ice into the bin and start the ice making cycle again. If your ice maker is making unusual noises, or if the ice maker is not making or dispensing ice, there could be an issue with the thermostat. Before you begin this repair, make sure the power is disconnected from your refrigerator, and that any food that may spoil is safely stored. This is an OEM part and is sourced directly from the manufacturer. This thermostat is sold individually, and comes with two attachment clips.
Replacing your Kenmore Refrigerator Refrigerator Cycling Thermostat

Customer Repair Stories
-
DAVID from TINLEY PARK, IL
-
Difficulty Level:A Bit Difficult
-
Total Repair Time:30 - 60 mins
-
Tools:Nutdriver
-
Wayne from Leesburg, FL
-
Difficulty Level:Really Easy
-
Total Repair Time:15 - 30 mins
-
Tools:Screw drivers, Socket set
This refrigerator ice maker fill cup dispenses the water into the ice cube mold during the fill cycle. Replacing the water fill cup is a possible solution if you notice that the ice maker is leaking, or not making/dispensing ice. If you notice the fill cup has been damaged or cracked; replace the part straight away. This water fill cup is a genuine OEM part and will fit most refrigerators, but check the list of compatible brands to make sure yours is included before purchasing.
Replacing your Kenmore Refrigerator Refrigerator Water Fill Cup & Bearing

Customer Repair Stories
Once I got this part, I removed the freezer door and trays, and pulled the icemaker out by removing 3 flathead screws and unplugging the c ... Read more ables. Laying in the freezer on the floor was a bit unconfortable, but not too bad.
Then I inspected the icemaker. There was no obvious way to remove the part without disassembling the front of the unit (where the motor is) to release the spindle and free the part, so I did that - 3 or 4 nuts was all that held it together. Once that was out, I removed the spindle, swapped out the part, and put it all back together and back in the freezer. Plugged it in and waited.
It took a while to start making ice. Like 5 hours. Now it's going pretty slow (much slower than before.) Haven't had time to look into it, but my suspicion is the rubber hose that feeds water into the icemaker is blocked with ice or kinked. In any case, we have ice now (but not a lot), and the unit shuts itself off properly. However, we went from having too much ice (thing never shut off) to too little (thing makes ice too slow), so I need to shoot for somewhere in the middle ;)
-
Jason from Austin, TX
-
Difficulty Level:A Bit Difficult
-
Total Repair Time:30 - 60 mins
-
Tools:Nutdriver, Screw drivers
-
David from Chester, CA
-
Difficulty Level:Really Easy
-
Total Repair Time:Less than 15 mins
-
Tools:Nutdriver, Screw drivers
This part is located at the bottom of the ice bucket.
Replacing your Kenmore Refrigerator Refrigerator Ice Bin Coupling

Customer Repair Stories
J. Keith Miller
-
Joseph Keith from High Point, NC
-
Difficulty Level:Really Easy
-
Total Repair Time:Less than 15 mins
-
Tools:Screw drivers
This is a great time to completely clean the Ice maker bin and crusher unit.
-
Stephen from Oregon City, OR
-
Difficulty Level:Easy
-
Total Repair Time:15 - 30 mins
-
Tools:Screw drivers
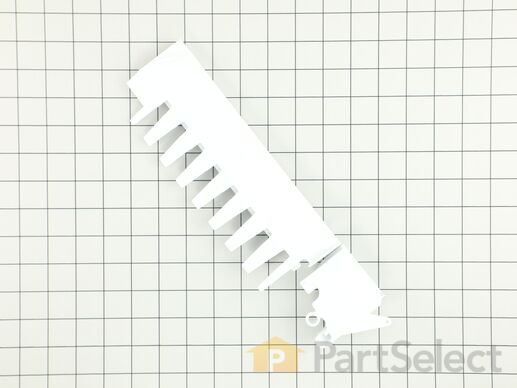
This part is a replacement flipper or emitter cover for your refrigerator. It is made of white plastic and is approximately 3 inches by 2 inches. The flipper shields the emitter control board and houses the flipper cover for the emitter board. If your flipper is broken or missing, your ice maker may not make or dispense ice, and will need to be replaced. This part is sold individually and is an authentic OEM part sourced directly from the manufacturer.
Replacing your Kenmore Refrigerator Refrigerator Flipper

Customer Repair Stories
-
Alfred from Jackson, NJ
-
Difficulty Level:Really Easy
-
Total Repair Time:Less than 15 mins
-
Tools:Socket set
-
Lawrence B from RAPID CITY, MI
-
Difficulty Level:Really Easy
-
Total Repair Time:Less than 15 mins
-
Tools:Pliers, Screw drivers
This kit includes the stripper arm and fill cup.
Replacing your Kenmore Refrigerator Stripper Arm Kit

Customer Repair Stories
-
Linda from evansville, IN
-
Difficulty Level:A Bit Difficult
-
Total Repair Time:1- 2 hours
-
Tools:Screw drivers
Once I had the unit completely out of the freezer the replacement part took only minutes ... Read more to replace.
Reversed the process putting the ice maker back in - a few hours later my ice buck was full again.
Simple repair - well worth the effort.
-
Mark from Newtown, PA
-
Difficulty Level:Easy
-
Total Repair Time:15 - 30 mins
-
Tools:Screw drivers, Socket set
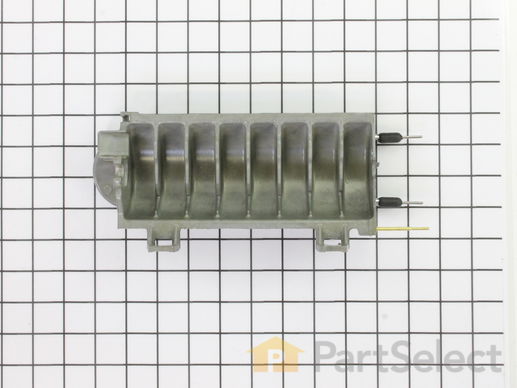
This is an ice maker mold and heater assembly for a refrigerator ice maker. It is used with modular style icemakers and is located in the freezer section of the refrigerator. This ice mold is flake resistant which prevents the coating on the mold from flaking into the ice cubes when the ice mold begins to wear. The ice mold forms the ice cubes and the heater allows the ice cubes to fall from the ice mold to drop them into the ice bucket. You will need to remove the ice maker from the refrigerator to access the mold and heater assembly. This is a genuine replacement part.
Replacing your Kenmore Refrigerator Refrigerator Ice Mold

Customer Repair Stories
-
Roger from Sunnyvale, CA
-
Difficulty Level:Easy
-
Total Repair Time:30 - 60 mins
-
Tools:Nutdriver, Screw drivers
-
George from Cottage Grove, MN
-
Difficulty Level:Really Easy
-
Total Repair Time:Less than 15 mins
-
Tools:Nutdriver, Screw drivers
This is a control bracket for your refrigerator, and may also be known as the dispenser control bracket. The function of this part is to hold the micro switches and the light socket in the freezer dispenser section in place. Its measurements are roughly 9 inches long and 5 inches high, and this model comes in white. The tools you will need in order to do this repair include a Phillips screw driver, a quarter-inch nut-driver, and a pair of needle-nose pliers. If your ice dispenser is not working properly, your bracket could be the problem.
Replacing your Whirlpool Refrigerator Refrigerator Control Bracket

Customer Repair Stories
I removed the faceplate and switches, removed all the switches and installed them in the new control bracket. I ... Read more nstalled new control bracket into fridge and tested. Works! Reinstalled faceplate and switches and drained system for a few minutes. Man I forgot how good filtered water tasted!
-
Bryan from Eugene, OR
-
Difficulty Level:Easy
-
Total Repair Time:15 - 30 mins
-
Tools:Nutdriver
Two screws held the external dispenser bezel, and t ... Read more wo screws held the control bracket in place. The wiring and switches were transferred to the new bracket and the new bracket screwed into place. Then the bezel was replaced.
Total repair time was less than 5 minutes. The control bracket was $16.50 with shipping and arrived two days after I placed the order.
The PartSelect website had a clear diagram of the control bracket so I was comfortable with the order.
-
John from Poway, CA
-
Difficulty Level:Easy
-
Total Repair Time:Less than 15 mins
-
Tools:Screw drivers
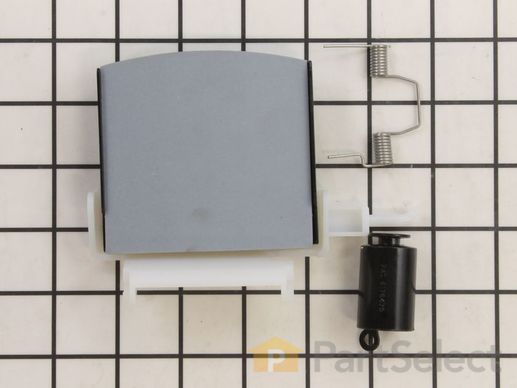
In this kit you will find the support, the ice door, spring, and delay. The heater ribbon is no longer needed and therefore will not be included with this part. This kit works in the dispenser chute to let ice through when it is being dispensed. If you have the following symptoms such as: door sweating, difficulty opening or closing door, frost buildup, warm freezer section, or problems with ice dispensing, then this is a solution. The tools needed for this repair are a putty knife, needle nose pliers, and 1/4 inch nut driver. Wear work gloves to protect your hands when performing this repair.
Replacing your Whirlpool Refrigerator Ice Door Kit

Customer Repair Stories
-
David from Chesterfield, MO
-
Difficulty Level:A Bit Difficult
-
Total Repair Time:30 - 60 mins
-
Tools:Pliers, Screw drivers, Socket set
-
helen j from murrells inlet, SC
-
Difficulty Level:Really Easy
-
Total Repair Time:15 - 30 mins
-
Tools:Nutdriver, Pliers, Screw drivers
The crisper drawer (Crisper Pan, Refrigerator Crisper Drawer) with humidity control is meant to keep your vegetables and fruit as fresh as possible by allowing you to regulate the humidity levels within the drawer. It attaches on the inside of your refrigerator to the bottom of the crisper shelf. This drawer can break from misuse or accidental damage. It is also subject to material fatigue over time. If broken or damaged, it may be difficult to slide the drawer in and out, and it should be replaced. This plastic drawer measures 14.92 inches long, 7.6 inches high, and 16.5 inches wide and comes in white/clear.
Replacing your Whirlpool Refrigerator Refrigerator Crisper Drawer w/Humidity Control

Customer Repair Stories
-
Paula from Chesterfield, NJ
-
Difficulty Level:Really Easy
-
Total Repair Time:Less than 15 mins
-
Darrell from Cedar Bluff, VA
-
Difficulty Level:Really Easy
-
Total Repair Time:Less than 15 mins
This black cap covers the water filter.
Replacing your Kenmore Refrigerator Refrigerator Cap Water Filter (Black)

Customer Repair Stories
-
STEVE from HUGHESVILLE, MD
-
Difficulty Level:Very Difficult
-
Total Repair Time:More than 2 hours
-
Pamela from Sacramento, CA
-
Difficulty Level:Really Easy
-
Total Repair Time:Less than 15 mins
This part is a replacement refrigerator drive shaft seal for your refrigerator. The drive shaft seal protects the auger motor from water and condensation that may leak down the drive shaft from the ice bucket. If the seal is broken, water and condensation can get in, causing the ice maker to fail. To replace the seal, first remove the ice bucket from your freezer. Then remove the two screws on the drive shaft holder, and use a pair of pliers to remove the drive shaft. At this point you can remove the seal from the drive shaft. Be sure to clean the area that the seal sits in before you reinstall the drive shaft. This part is white in color and is about an inch in diameter. The seal is sold individually.
Customer Repair Stories
-
John from DUNNELLON, FL
-
Difficulty Level:Really Easy
-
Total Repair Time:30 - 60 mins
-
Tools:Pliers, Socket set
This coupling is used for indoor ice dispensers.
Customer Repair Stories
2. Unscrew the two Phillips screws on the base of the ice box compartment
3. Lift up the coupling and shaft (be careful because there is a spring between shaft and coupling and washer)
4. Remove old coupling
5. Replace with new coupling and remember to put back the spring
6. Insert back shaft ... Read more with coupling and washer
7. Screw back on the Phillips screws
8. Replace back the icebox
-
Robert from WESTFORD, MA
-
Difficulty Level:Very Easy
-
Total Repair Time:Less than 15 mins
-
Tools:Screw drivers
-
patrick from fairfax, VA
-
Difficulty Level:Really Easy
-
Total Repair Time:Less than 15 mins
-
Tools:Socket set
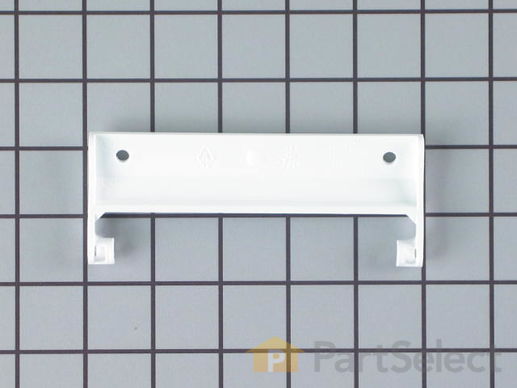
This is the replacement ice maker cover bracket for your refrigerator. It is made of white plastic and is approximately 5 inches wide and 2 inches long. The ice maker cover bracket holds and supports the ice maker cover. If the ice maker cover is loose or missing, you may need to replace the bracket. You will also want to replace the bracket if it will not stay in place, or if it is cracked or broken. To replace the cover bracket, simply remove the ice maker cover, then use a ¼ inch nut driver to loosen and remove the bracket. Screw in the new bracket and replace the cover to complete your repair. This is an OEM part that is sold individually.
Replacing your Kenmore Refrigerator Ice Maker Cover Bracket

Customer Repair Stories
-
Louis from PELHAM, NY
-
Difficulty Level:Really Easy
-
Total Repair Time:30 - 60 mins
-
brian from fresno, CA
-
Difficulty Level:Really Easy
-
Total Repair Time:Less than 15 mins
-
Tools:Nutdriver
This washer is sold individually.
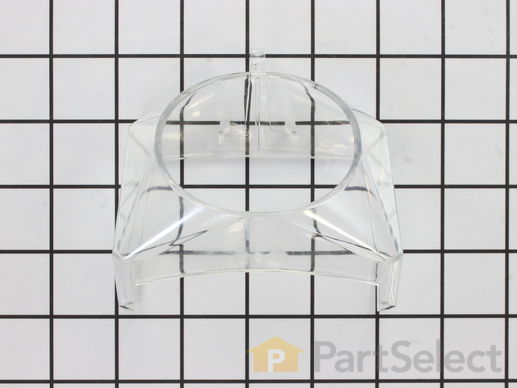
This is a refrigerator ice guide that is made entirely of clear plastic. This ice guide is located in the freezer door. Turn your refrigerator ice dispenser off before replacing the part. This is a simple repair, and the only tool you will need is a small flat blade screwdriver to push on the pivot tab on the bottom of the ice guide. Do not worry about breaking the side or pivot tabs on your existing ice guide because it will be discarded anyway. This is a genuine manufacturer replacement part.
Replacing your Whirlpool Refrigerator Refrigerator Ice Guide

Customer Repair Stories
-
Richard from Bloomington, IL
-
Difficulty Level:Easy
-
Total Repair Time:Less than 15 mins
Snapping it on was a breeze, although you do have to apply more pressure than feels ... Read more comfortable with plastic clips. We can know get ice out of the external door system again.
-
Tracy from Jacksonville, FL
-
Difficulty Level:Really Easy
-
Total Repair Time:Less than 15 mins
This part is the drive shaft for the auger.
Customer Repair Stories
-
Dave from LOGANVILLE, GA
-
Difficulty Level:Really Easy
-
Total Repair Time:Less than 15 mins
-
Tools:Socket set
-
terry from panama city beach, FL
-
Difficulty Level:Really Easy
-
Total Repair Time:More than 2 hours
-
Tools:Nutdriver
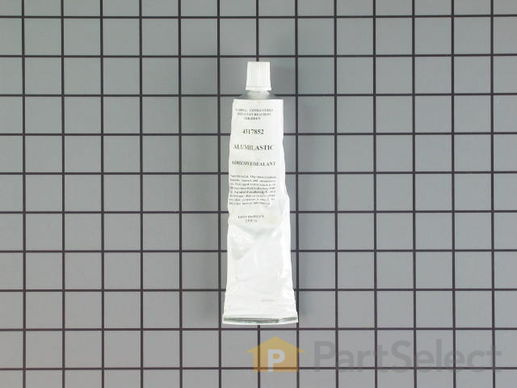
Also known as Alumilastic Cement.


