Your coupon for will be reflected when you check out!
✖
Your coupon for
✖
Hello!
You're visiting the PartSelect site in U.S.
Would you like to shop on the Canadian site?
Stay on this site
Go to Canadian site
✖
Model Number Locations
1Select Category Type
Select Category Type
2Select Product Type
Select Product Type
3Select {MODEL} Type
Select {MODEL} Type
Sample Model Number Tags
Model numbers can be made up of numbers (1005400, for example) or a combination of letters and numbers (LAT1000AAE). The model number will most likely appear on either a paper sticker or a metal plate. Your appliance's model number tag may look similar to the sample model number tags shown here (model number highlighted in yellow):
Model has been saved to My Models. If you're not signed in, your lists are available on this device and will expire within 30 days.
Model has been saved to My Models.
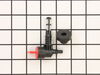
Made of durable rubber and plastic components, this Fuel Valve and Bushing are designed for use in over 150 models of generators and pressure washers. This item is sold as a kit, including the valve a...
This OEM replacement fuel gauge cap is designed for use in generators. It comes in a cylindrical shape and has a built-in window to easily view the fuel levels without pulling out the entire cap. It i...
The OEM voltage regulator or voltage control is a part used to regulate the voltage so it can provide the right amount of power to electrical components. It attaches inside the alternator housing. The...
The OEM E-Ring is a silver metal part used to secure the wheel on the shaft. If broken, the wheel may fall off, and the part must be replaced. It is rated as "Easy" to install and requires pliers and a screw driver.
The brush holder assembly in your generator keeps the brushes in place, allowing them to touch the rotor. It consists of a plastic brush holder and two carbon brushes with lead wires and attached spri...
The authentic 10" Wheel Assembly (Wheel, 10" Diameter) is a 10-inch black, plastic-and-ubber wheel. It allows easy moving of the generator. Installation requires pliers and is rated as "Easy". If your...
This rear bearing cover is designed to protect and insulate the rear bearing of the engine. It is an authentic OEM replacement part with a diameter of approximately 8 inches. It comes with a center/du...
Put some dish soap on the rubber, push into the tank hole, slip 1x2 into the handle of the tank and over the new part and pry down pushing it into the hole. Took about 2 minutes.
old valve easily pulled out with screwdriver and pliers
install difficult due to 40 degree cold temp and bushing didn't want to squeeze into fuel tank hole
install required lots of liquid soap on bushing, which popped into place by using upward prying pressure from 3"X24" plywood braced into under-shelf of gas tank
... Read morer /> used same technique to insert valve upward into bushing